Watermelon Mochi Recipe
Watermelon Mochi is one of those delightful treats that instantly transports you to a sunny summer day filled with laughter and fruity freshness. This chewy, sweet snack marries the delicate flavor of watermelon juice with the satisfyingly soft texture of classic mochi, creating a dessert that feels both indulgent and refreshingly light. If you love mochi but want to try something a little more vibrant and fruity, this Watermelon Mochi recipe is going to become your new favorite, trust me!
Ingredients You’ll Need
Getting the ingredients just right is key to nailing the perfect texture and flavor of Watermelon Mochi. Each component plays a crucial role, from the starches that provide that iconic chew to the fresh juice that infuses it with natural sweetness and color.
- 200g Glutinous rice flour: This gives mochi its signature chewy and stretchy texture, so don’t substitute it.
- 65g Granulated sugar: Adds the perfect amount of sweetness to enhance the watermelon flavor without overpowering it.
- 40g Corn starch: Helps with dusting and gives a light coating to prevent sticking, plus it lightens the dough slightly.
- 240ml Watermelon juice, strained: The star of the show! Fresh and vibrant, it brings a natural pink hue and juicy freshness to your mochi.
- 1 1/2 tbsp Vegetable oil: Keeps the mochi soft and prevents it from drying out during cooking.
How to Make Watermelon Mochi
Step 1: Prepare the Watermelon Juice
Start by blending fresh watermelon flesh until smooth, then strain it through a fine mesh sieve to remove any pulp or seeds. This step ensures your Watermelon Mochi will have a silky, consistent texture and vibrant pink color—no surprises in texture here!
Step 2: Mix the Dry Ingredients
Combine the glutinous rice flour, granulated sugar, and cornstarch in a large mixing bowl. Taking a moment to whisk these together evenly will make sure your mochi cooks uniformly without any lumps.
Step 3: Combine with Watermelon Juice and Oil
Pour in the freshly strained watermelon juice and vegetable oil into the dry ingredients. Whisk everything together until you’re left with a smooth, runny batter. The mixture should have a beautiful pink hue that’s almost too pretty to cook—almost!
Step 4: Cook the Mochi Mixture
Heat a deep frying pan or saucepan over medium heat. Pour in the mochi batter and stir constantly for about 5 to 8 minutes. You want the mixture to thicken and become a dark pink translucent color—sticky and stretchy, just like the mochi you love. This step takes some arm work but is so worth it for that perfect chew!
Step 5: Set in a Mold
Remove the thickened mochi from heat and quickly pour it into a prepared 12cm x 12cm square mold lined with parchment paper. If you don’t have that specific size, any small rectangular container will do. Press the mochi down gently to smooth the surface, then pop the mold into the fridge to cool and firm up for 1 to 2 hours.
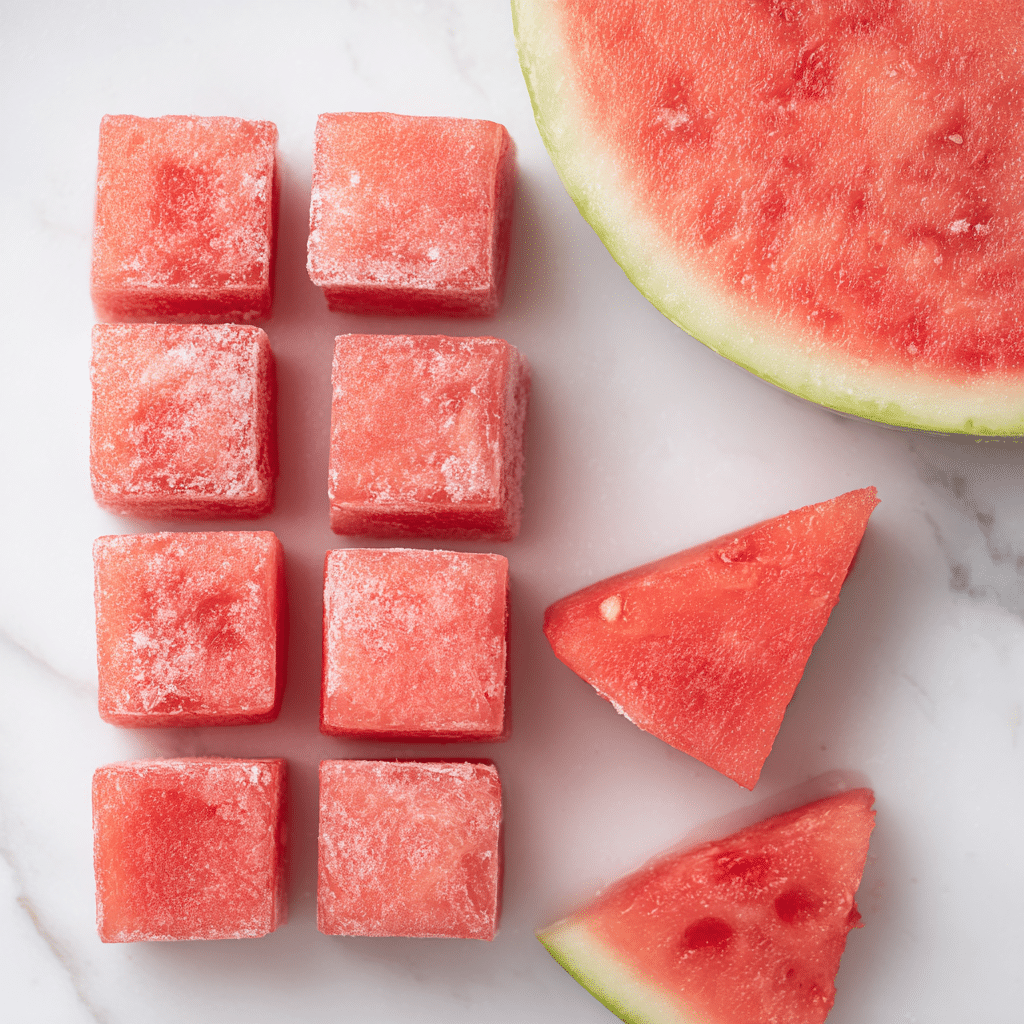
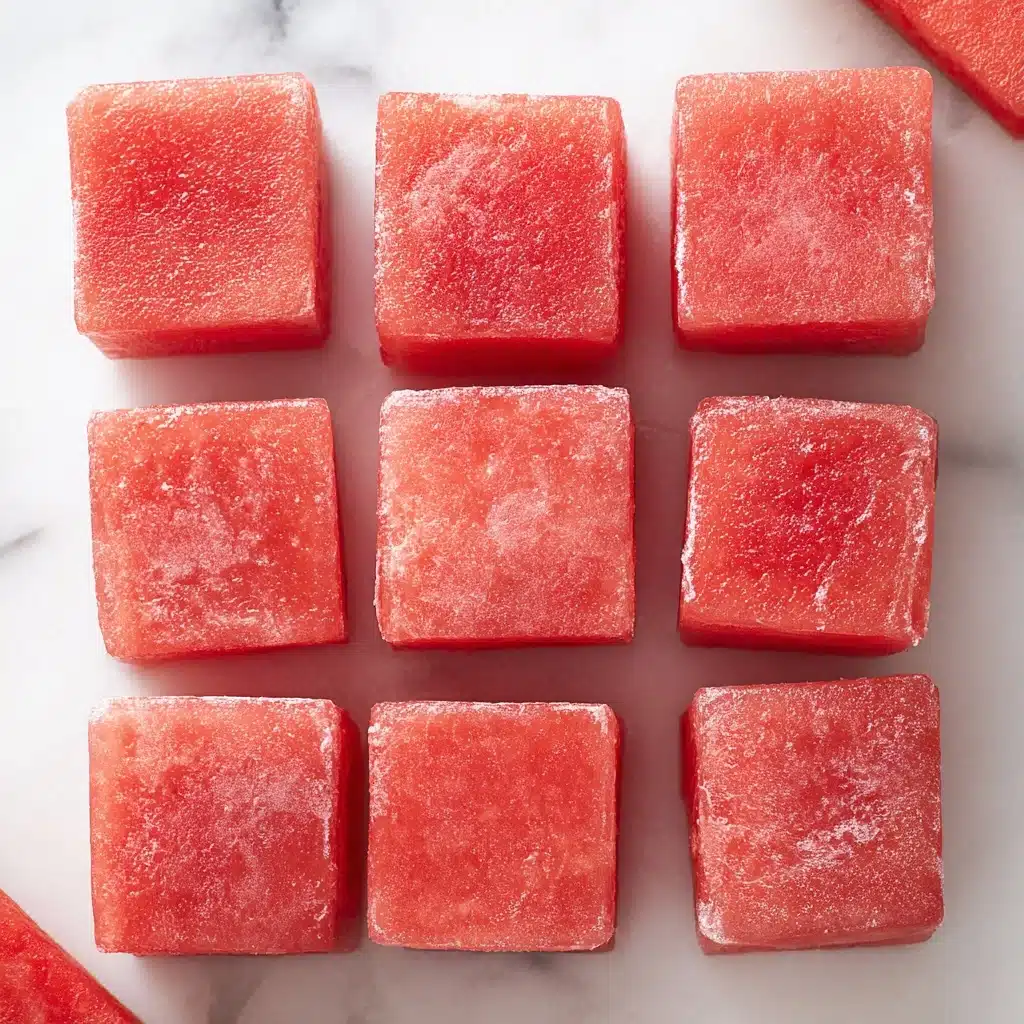
Step 6: Cut and Dust
Once chilled, dust your work surface generously with cornstarch to prevent sticking. Turn the mochi out of its mold and dust the top as well. With an oiled knife, cut the mochi into 12 equally sized pieces. Finally, give each piece a good dusting of cornstarch on all sides. Now it’s time to serve your gorgeous Watermelon Mochi!
How to Serve Watermelon Mochi
Garnishes
For an extra touch of elegance, sprinkle the Watermelon Mochi with toasted sesame seeds or a dusting of matcha powder. Both add wonderful contrast in flavor and texture that highlights the mochi’s sweetness and chewiness. A tiny sprig of fresh mint can also bring a refreshing aroma to each bite.
Side Dishes
Serve your Watermelon Mochi alongside a cup of lightly brewed green tea or jasmine tea to balance the sweetness. For a fun twist, pair it with a small bowl of fresh fruit salad or a scoop of coconut ice cream, enhancing the melon’s summery vibe and keeping the palate fresh and lively.
Creative Ways to Present
Why not turn your Watermelon Mochi into colorful fruit skewers or arrange the pieces in a blooming flower shape on a pretty plate? You could even wrap each piece in a thin edible rice paper for a unique twist. Beautifully stacked in a glass jar or a clear box, they make perfect gifts or party favors too!
Make Ahead and Storage
Storing Leftovers
If you find yourself with extra Watermelon Mochi, store the pieces in an airtight container dusted with cornstarch to avoid sticking. Keep them in the refrigerator and enjoy within 2 to 3 days before they start losing their silky texture.
Freezing
Mochi freezes well, so for longer storage, wrap each piece individually in plastic wrap and place them in a ziplock bag. Freeze for up to a month. When you’re ready to eat, allow them to thaw in the fridge to retain their chewy softness.
Reheating
To bring back the perfect chewy texture, steam frozen or refrigerated Watermelon Mochi for a few minutes or microwave briefly in short bursts with a damp paper towel to keep them moist. Just be careful not to overheat, or they might turn rubbery.
FAQs
Can I use watermelon juice from concentrate or bottled juice?
For the best natural flavor and vibrant color, fresh watermelon juice is recommended. Bottled juices often contain preservatives or added sugars that may alter the taste and texture of your Watermelon Mochi.
What can I substitute for cornstarch if I don’t have it?
You can use potato starch or tapioca starch as a substitute in equal amounts. These starches will similarly prevent sticking and help with dusting the mochi pieces.
How long does Watermelon Mochi last in the fridge?
Stored in an airtight container, Watermelon Mochi stays fresh and chewy for about 2 to 3 days. After that, it may begin to harden or dry out.
Is Watermelon Mochi gluten-free?
Yes! Since it’s made with glutinous rice flour, which is naturally gluten-free, this Watermelon Mochi is safe for those avoiding gluten. Just double-check that all other ingredients, like the cornstarch, are also gluten-free in your region.
Can I add fillings to this mochi?
Absolutely! Small pieces of sweet red bean paste, fresh fruit bits, or even a dab of sweetened cream cheese make delightful fillings. Just wrap the mochi dough around the filling before setting it in the mold.
Final Thoughts
There’s something truly magical about making Watermelon Mochi at home—it’s fun, vibrant, and utterly delicious. Once you’ve experienced the perfect chew combined with the natural sweetness and color of fresh watermelon, you’ll see why this recipe quickly becomes a summer tradition. Give it a try, invite friends over, and watch this pretty pink treat disappear in no time!
Watermelon Mochi Recipe
Delight in the sweet, chewy texture of Watermelon Mochi, a vibrant twist on traditional mochi made with fresh watermelon juice for a refreshing fruity flavor. This recipe combines glutinous rice flour and watermelon juice to create a sticky, pink-hued dessert perfect for hot days or a unique treat anytime.
- Prep Time: 15 minutes
- Cook Time: 8 minutes
- Total Time: 1 hour 30 minutes
- Yield: 12 pieces 1x
- Category: Dessert
- Method: Stovetop Cooking, Refrigeration
- Cuisine: Japanese-inspired
- Diet: Vegetarian
Ingredients
Mochi Base
- 200g Glutinous rice flour (1 1/2 cup)
- 65g Granulated sugar (1/3 cup)
- 40g Corn starch (1/3 cup), plus extra for dusting
- 240ml Watermelon juice, strained (1 cup)
- 1 1/2 tbsp Vegetable oil
Instructions
- Prepare Watermelon Juice: Place watermelon flesh in a blender and blend until smooth. Strain through a fine mesh sieve to remove any pulp, yielding fresh watermelon juice.
- Mix Dry Ingredients: In a large bowl, combine glutinous rice flour, sugar, and cornstarch thoroughly.
- Add Wet Ingredients: Pour in the watermelon juice and vegetable oil, whisking until the mixture is smooth with no lumps.
- Cook Mochi Mixture: Heat a deep frying pan or saucepan over medium heat. Add the mochi mixture and stir continuously for 5-8 minutes until it thickens and turns a dark pink translucent color, becoming very sticky.
- Prepare Mold: Line a 12cm x 12cm square mold (or a similarly sized small rectangular container) with parchment paper.
- Set Mochi: Pour the warm mochi mixture into the lined mold and use a spatula to press and flatten it evenly.
- Chill Mochi: Place the mold in the refrigerator for 1-2 hours until the mochi firms up slightly.
- Dust Surface: Generously dust your work surface with cornstarch to prevent sticking.
- Cut Mochi: Remove the mochi from the mold and place it onto the dusted surface. Dust the top with more cornstarch. Using an oiled knife, cut the mochi into 12 equal pieces.
- Finish: Separate each piece and dust all sides with more cornstarch. Serve and enjoy the chewy, fruity mochi!
Notes
- Ensure the watermelon juice is well strained to avoid a watery mochi texture.
- Use an oiled knife to cut mochi easily without sticking.
- Store leftover mochi in an airtight container in the refrigerator and consume within 2 days for best texture.
- For varied flavor, try substituting watermelon juice with other fruit juices like mango or strawberry.
- Wear gloves or dust hands with cornstarch when handling mochi to prevent sticking.
Nutrition
- Serving Size: 1 piece (approx. 30g)
- Calories: 80 kcal
- Sugar: 6 g
- Sodium: 2 mg
- Fat: 1.2 g
- Saturated Fat: 0.2 g
- Unsaturated Fat: 1 g
- Trans Fat: 0 g
- Carbohydrates: 17 g
- Fiber: 0.3 g
- Protein: 1 g
- Cholesterol: 0 mg
Keywords: Watermelon mochi, mochi recipe, glutinous rice dessert, fruity mochi, Japanese dessert, watermelon dessert