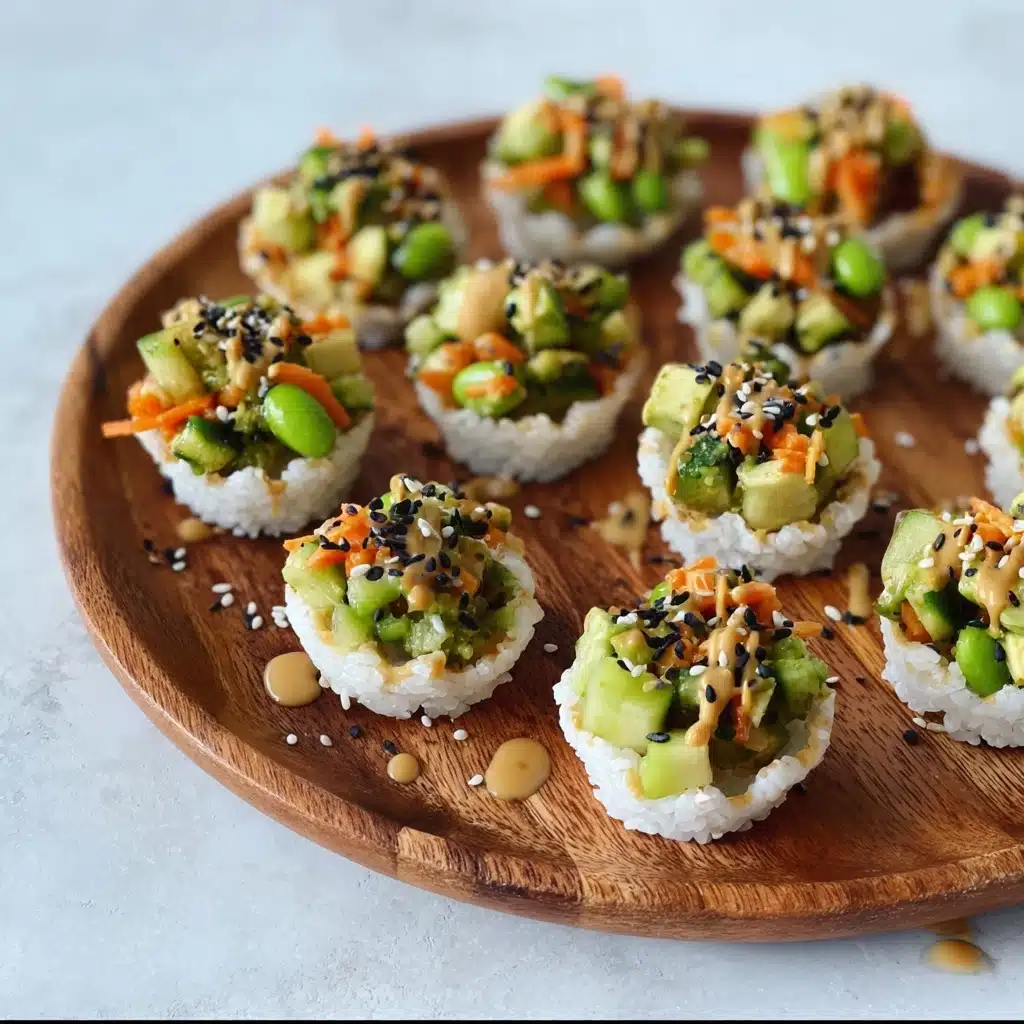
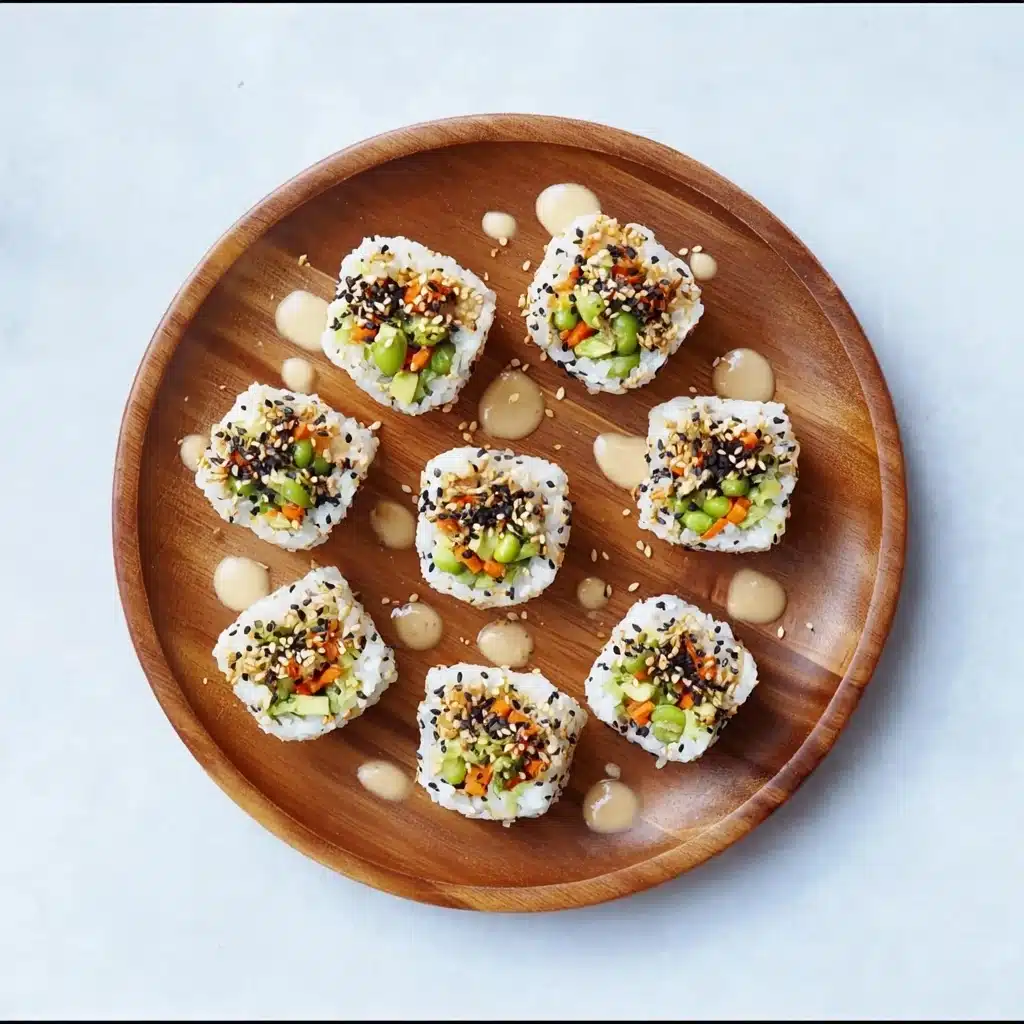
Sushi Cups
If you’re on the lookout for a fun, bite-sized treat that brings all the joy of sushi without the fuss, you have to try these delightful Sushi Cups! They are an absolute crowd-pleaser, combining perfectly cooked sushi rice with fresh veggies, creamy avocado, and a spicy mayo drizzle that sings with flavor. Easy to assemble yet impressive to serve, Sushi Cups offer a fresh, colorful spin on sushi that’s perfect for parties, snacks, or a light meal. Trust me, once you make them, they’ll become your go-to for any occasion when you want sushi-style satisfaction without rolling or slicing.
Ingredients You’ll Need
The beauty of Sushi Cups lies in their simplicity — each ingredient plays a crucial role, whether it’s the fluffy sushi rice forming the sturdy base or the crunchy veggies providing a fresh bite. This combination of tastes and textures makes every cup something special.
- 1 cup sushi rice, rinsed: Properly rinsed rice is key to that perfect sticky texture that holds the cups together.
- 1 1/2 cups water: For cooking the rice evenly and thoroughly.
- 1/2 cup finely chopped veggies: Use crunchy, raw-friendly veggies like carrots, cucumber, bell peppers, or sprouts for freshness and color.
- 1/4 cup steamed mukimame (shelled edamame): Adds a tender bite and extra plant protein to the mix.
- 1/4 cup diced avocado: Creamy texture that beautifully contrasts the crisp veggies.
- 1 tablespoon sauce of your choice: Soy sauce, tamari, or coconut aminos pack in savory umami flavor to the filling.
- For the Spicy Mayo:
- 1/4 cup mayonnaise: The creamy foundation for the spicy topping.
- 1 teaspoon Sriracha sauce: Adds a vibrant kick; adjust to your heat preference.
- 1 teaspoon coconut aminos or soy sauce: Deepens the flavor of the spicy mayo.
- 1 teaspoon honey: Balances heat with a touch of sweetness.
- 1/2 teaspoon sesame oil: Brings a rich, nutty aroma.
- Black sesame seeds, for garnish: For that classic sushi look and a subtle crunch on top.
How to Make Sushi Cups
Step 1: Cook the Sushi Rice
The foundation of your Sushi Cups starts with perfectly cooked sushi rice. Combine the rinsed rice and water in a pot, bring it to a boil, then simmer gently for 20 minutes until all water is absorbed. Let it cool a bit, ensuring it’s sticky but not too hot for handling.
Step 2: Form the Rice Cups
Press heaping tablespoons of the cooled rice firmly into each cup of a muffin tin. This compacts the rice so it holds shape. Pop the tin into the fridge for 20 minutes to let the rice set up nice and firm—this step ensures your Sushi Cups won’t crumble when you add toppings.
Step 3: Prepare the Veggie Filling
While the rice chills, mix your finely chopped veggies, steamed edamame, diced avocado, and your chosen sauce in a bowl. This medley creates a fresh, flavorful filling that balances the creamy and crunchy textures perfectly.
Step 4: Whisk Together the Spicy Mayo
In a separate small bowl, combine mayonnaise, Sriracha, soy sauce or coconut aminos, honey, and sesame oil. Whisk until smooth, then taste and adjust spice levels. This sauce adds just the right zing to every bite.
Step 5: Assemble the Sushi Cups
Remove the rice cups from the fridge and gently spoon the veggie mixture into each one. Drizzle generously with the spicy mayo and sprinkle black sesame seeds on top for a beautiful finish. Serve immediately for the freshest taste and perfect texture.
How to Serve Sushi Cups
Garnishes
Beyond black sesame seeds, you can jazz up your Sushi Cups with thinly sliced green onions, tiny nori strips, or even a touch of pickled ginger on the side. These add bursts of color and complementary tastes that make each cup pop visually and flavor-wise.
Side Dishes
Sushi Cups pair wonderfully with light, refreshing sides. A crisp seaweed salad, miso soup, or even a simple cucumber salad bring balance and complete the sushi-inspired experience without overwhelming the palate.
Creative Ways to Present
Try serving Sushi Cups on a bamboo sushi mat or slate tray for a true touch of elegance. You can also customize by offering an assortment of sauces at the table like extra soy sauce, wasabi mayo, or ponzu for dipping, inviting guests to personalize their bites.
Make Ahead and Storage
Storing Leftovers
If you happen to have leftovers, store the rice cups separately from the veggie filling and spicy mayo in airtight containers in the fridge. Assemble just before serving to prevent sogginess and keep everything fresh.
Freezing
Freezing Sushi Cups is not recommended because the texture of sushi rice and avocado can become unpleasantly mushy upon thawing. It’s best to enjoy these cups fresh or within a day or two of making.
Reheating
If you want to serve the rice warm, gently reheat the rice cups in a microwave for a few seconds before adding the cold veggie filling and spicy mayo. Avoid reheating once fully assembled to maintain texture contrast.
FAQs
Can I use regular rice instead of sushi rice for Sushi Cups?
Sushi rice is best for Sushi Cups because it has a sticky texture that holds together well, unlike regular long-grain rice which tends to be fluffy and separate. The sticky rice is key to forming neat cups.
How spicy are the Sushi Cups with the included spicy mayo?
The spicy mayo offers a gentle heat that you can easily control by adjusting the amount of Sriracha. It’s designed to add a pleasant kick without overpowering the fresh veggies and rice.
Can I make Sushi Cups vegan?
Absolutely! Just swap the mayonnaise in the spicy mayo for a vegan alternative, and use tamari or coconut aminos instead of soy sauce if you want to keep it soy-free. The filling is naturally plant-based already.
What’s the best way to serve Sushi Cups at a party?
Sushi Cups are perfect as finger food. Present them on a stylish platter with garnish options nearby and small dipping bowls for extra sauce, making it easy for guests to grab and enjoy without utensils.
Can I add seafood to Sushi Cups?
Yes! Cooked shrimp, imitation crab, or even finely chopped smoked salmon can be folded into the veggie mixture or added as a topping for a more traditional sushi flavor. Just ensure any seafood is fresh and handled safely.
Final Thoughts
Sushi Cups are a joy to make and even more fun to eat, bringing together wonderful textures and flavors in a convenient, shareable format. Whether you’re new to sushi or a seasoned fan, I encourage you to give these a try—they’re bound to become a beloved recipe in your kitchen and a hit with everyone at your table.
PrintSushi Cups

These Sushi Cups are a fun and fresh way to enjoy sushi flavors without rolling. Made with seasoned sushi rice, crisp veggies, creamy avocado, and a spicy mayo drizzle, they are perfect as a light appetizer or snack. The combination of textures and flavors, paired with simple ingredients, makes these cups an easy, no-fuss sushi-inspired treat that’s gluten-free and vegetarian.
- Prep Time: 10 minutes
- Cook Time: 20 minutes
- Total Time: 50 minutes
- Yield: 8 sushi cups 1x
- Category: Appetizer
- Method: Simmering, Chilling
- Cuisine: Japanese-inspired
- Diet: Gluten Free
Ingredients
Sushi Ingredients:
- 1 cup sushi rice, rinsed
- 1 1/2 cups water
- 1/2 cup finely chopped veggies of your choice (carrots, cucumber, bell peppers, sprouts)
- 1/4 cup steamed mukimame (shelled edamame)
- 1/4 cup diced avocado (~1/2 small avocado)
- 1 tablespoon sauce of your choice (soy sauce, tamari, or coconut aminos)
Spicy Mayo Ingredients:
- 1/4 cup mayonnaise
- 1 teaspoon Sriracha sauce (adjust to taste)
- 1 teaspoon coconut aminos or soy sauce
- 1 teaspoon honey
- 1/2 teaspoon sesame oil
- Black sesame seeds, for garnish
Instructions
- Cook the Rice: In a medium pot, combine the rinsed sushi rice and water. Bring it to a boil over high heat, then reduce the heat to low, cover, and simmer for 20 minutes until the rice is cooked and the water is absorbed. Remove from heat and let cool slightly.
- Form the Rice Cups: Press about 2 heaping tablespoons of the cooked rice firmly into each cup of a muffin tin to compact it. Place the muffin tin in the fridge and chill for 20 minutes to allow the rice cups to set properly.
- Prepare the Veggie Filling: In a mixing bowl, combine the finely chopped veggies, steamed edamame, diced avocado, and your choice of soy sauce, tamari, or coconut aminos. Mix everything well to blend the flavors.
- Make the Spicy Mayo: In a separate bowl, whisk together the mayonnaise, Sriracha sauce (adjust to your preferred heat level), soy sauce or coconut aminos, honey, and sesame oil until smooth and creamy.
- Assemble the Sushi Cups: Remove the rice cups from the fridge. Spoon a heaping tablespoon of the veggie mixture on top of each rice cup. Drizzle the spicy mayo over the veggies, then garnish with black sesame seeds. Serve immediately.
Notes
- Use vegetables that can be eaten raw to maintain a fresh, crunchy texture.
- Chilling the rice cups helps them hold their shape and makes serving easier.
- Adjust the spiciness of the mayo according to your taste preference.
- These sushi cups are best enjoyed the same day for optimal freshness.
- For a vegan option, substitute mayonnaise with vegan mayo and honey with agave syrup.
Nutrition
- Serving Size: 1 sushi cup
- Calories: 120
- Sugar: 2.5g
- Sodium: 150mg
- Fat: 6g
- Saturated Fat: 1g
- Unsaturated Fat: 4g
- Trans Fat: 0g
- Carbohydrates: 15g
- Fiber: 2g
- Protein: 4g
- Cholesterol: 10mg
Keywords: sushi cups, sushi appetizer, gluten free sushi, vegetarian sushi, easy sushi recipe, spicy mayo, healthy snack