Peppermint Swirl Cookies Recipe
Introduction
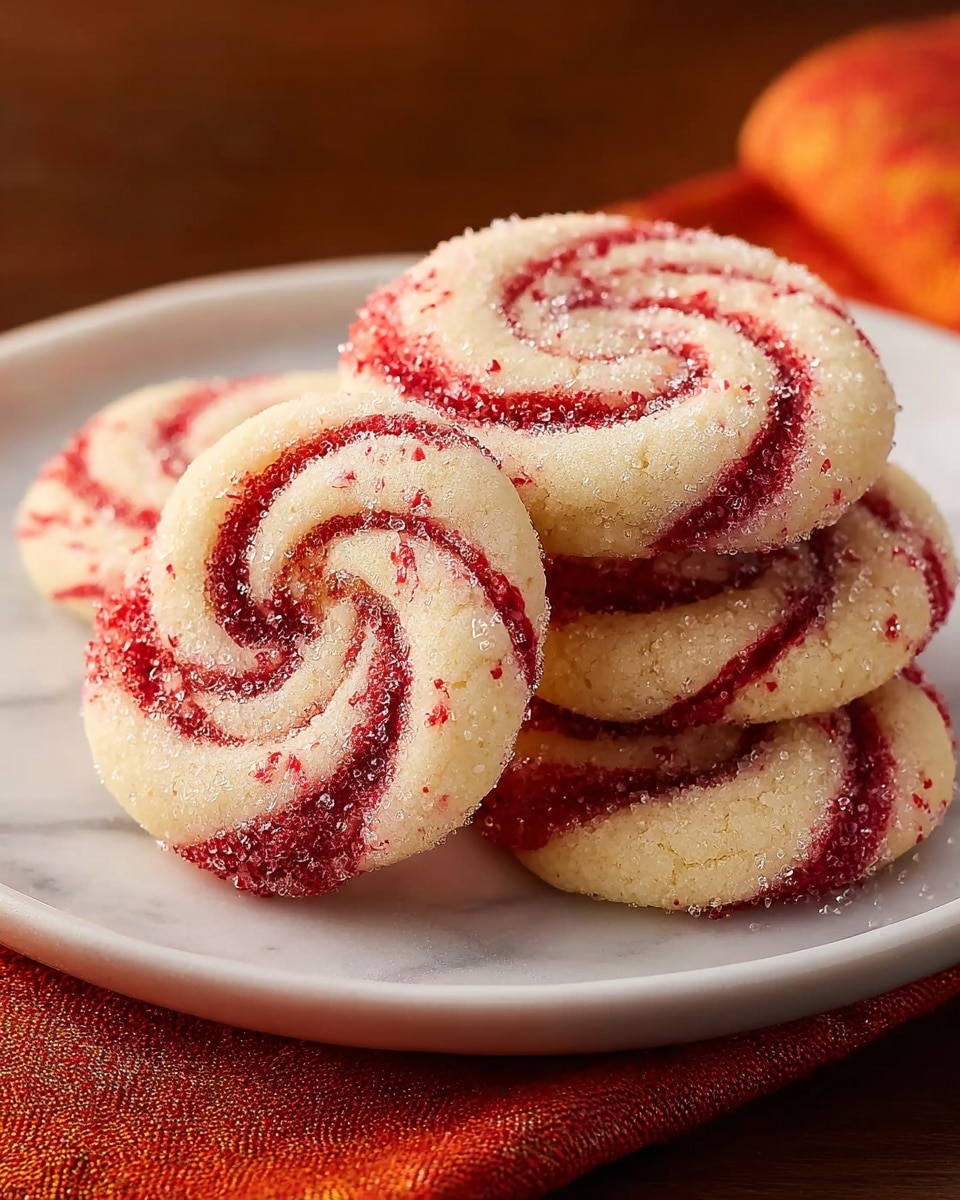
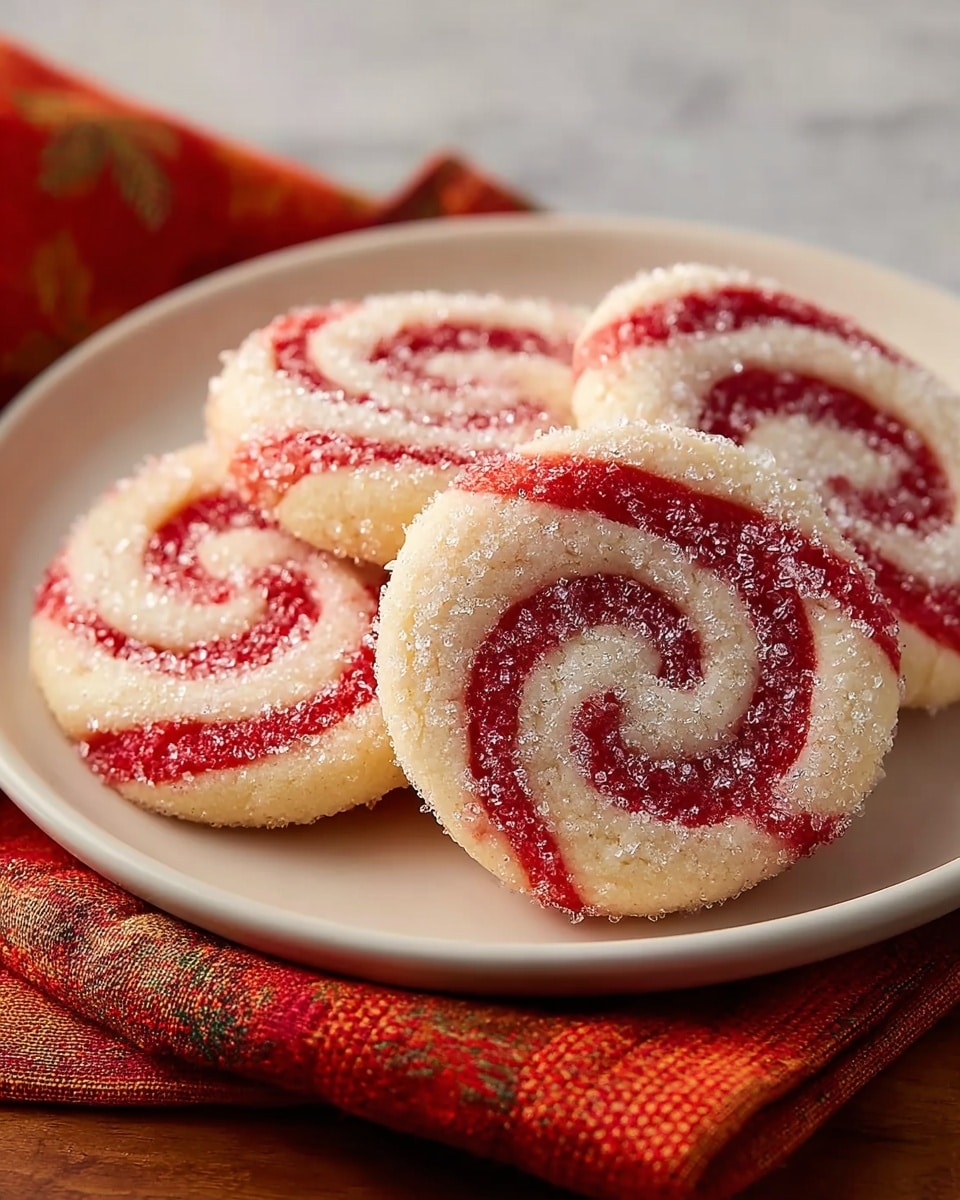
Peppermint Swirl Cookies are a festive treat that combines a classic buttery cookie with a refreshing hint of peppermint and a vibrant red swirl. These visually striking cookies are perfect for holiday gatherings or any time you want a sweet, minty delight.
Ingredients
- 2 and 1/2 cups all-purpose flour
- 1 teaspoon baking powder
- 1/2 teaspoon salt
- 1 cup (2 sticks) unsalted butter, softened
- 1 cup granulated sugar
- 1 large egg
- 1 teaspoon vanilla extract
- 1 teaspoon peppermint extract
- Red gel food coloring
- 1/4 cup coarse sugar or crushed peppermint candies for coating
Instructions
- Step 1: In a medium bowl, whisk together the flour, baking powder, and salt. Set aside.
- Step 2: In a large bowl, using an electric mixer, cream together the softened butter and granulated sugar until light and fluffy. Beat in the egg, then the vanilla extract and peppermint extract until well combined.
- Step 3: Gradually add the dry ingredients to the wet ingredients, mixing on low speed until just combined and a soft dough forms. Do not overmix.
- Step 4: Divide the dough in half. Leave one half plain. Add red gel food coloring to the second half, mixing until the color is uniform.
- Step 5: Wrap each ball of dough separately in plastic wrap and chill in the refrigerator for at least 30 minutes. This firms the dough, making it less sticky and easier to handle without the colors bleeding.
- Step 6: On a lightly floured surface, roll out the plain dough into a 10×12 inch rectangle about 1/4 inch thick. Repeat with the red dough, rolling it to the same size and thickness.
- Step 7: Carefully lay the red dough rectangle directly on top of the plain dough rectangle and gently press them together.
- Step 8: Starting from one long side, carefully roll the layered dough tightly into a log. Press gently to eliminate air pockets and ensure the log is consistently tight for clear swirls.
- Step 9: Wrap the dough log tightly in plastic wrap and chill again in the refrigerator for at least 2 hours, or until very firm. This helps maintain the swirl pattern when slicing.
- Step 10: Preheat your oven to 375 degrees F (190 degrees C). Line baking sheets with parchment paper.
- Step 11: Remove the chilled dough log from the refrigerator. If desired, brush the log lightly with water or whisked egg white, then roll it in coarse sugar or crushed peppermint candies to coat evenly.
- Step 12: Using a sharp knife, slice the log into 1/4 inch thick rounds. Place the sliced cookies about 1 inch apart on the prepared baking sheets.
- Step 13: Bake for 8 to 10 minutes, or until the edges are lightly golden. Do not overbake.
- Step 14: Let the cookies cool on the baking sheets for a few minutes before transferring them to a wire rack to cool completely.
Tips & Variations
- Use gel food coloring for bright, vibrant swirls without altering the dough’s texture.
- Chill the dough thoroughly to make slicing easier and prevent the swirls from blending together.
- Substitute crushed peppermint candies with colored sanding sugar for a different festive look and texture.
- For a stronger peppermint flavor, increase the peppermint extract slightly but avoid overpowering the cookie.
Storage
Store the cookies in an airtight container at room temperature for up to one week. To keep them crisp, place a slice of bread in the container to absorb moisture. These cookies also freeze well; freeze in a single layer on a baking sheet, then transfer to a freezer bag for up to three months. Reheat briefly in a low oven to refresh their texture.
How to Serve
Serve this delicious recipe with your favorite sides.
FAQs
Can I use almond extract instead of peppermint extract?
Yes, almond extract will give the cookies a different but delicious flavor. Use the same amount, but be aware it will change the classic peppermint taste.
Why is it important to chill the dough twice?
Chilling the dough after coloring firms it up, making it easier to handle and preventing the colors from bleeding. The second chill after rolling the dough ensures a firm log that slices cleanly, preserving the swirl pattern for perfect-looking cookies.
PrintPeppermint Swirl Cookies Recipe
These Peppermint Swirl Cookies combine a delightful blend of classic buttery sugar cookie dough with a festive peppermint twist. Featuring a vibrant red and white swirl pattern, these cookies are perfect for holiday celebrations or whenever you crave a refreshing minty treat. The dough is chilled twice to ensure sharp, beautiful swirls and perfect texture, then baked to a crisp, golden-edged finish and coated with crunchy coarse sugar or crushed peppermint candies.
- Prep Time: 20 minutes
- Cook Time: 10 minutes
- Total Time: 3 hours 30 minutes
- Yield: About 24 cookies 1x
- Category: Dessert
- Method: Baking
- Cuisine: American
- Diet: Vegetarian
Ingredients
Dry Ingredients
- 2 and 1/2 cups all-purpose flour
- 1 teaspoon baking powder
- 1/2 teaspoon salt
Wet Ingredients
- 1 cup (2 sticks) unsalted butter, softened
- 1 cup granulated sugar
- 1 large egg
- 1 teaspoon vanilla extract
- 1 teaspoon peppermint extract
Additional Ingredients
- Red gel food coloring (amount as needed for desired color)
- 1/4 cup coarse sugar or crushed peppermint candies for coating
Instructions
- Mix dry ingredients: In a medium bowl, whisk together the all-purpose flour, baking powder, and salt. Set this mixture aside to be added later.
- Cream butter and sugar: In a large bowl, use an electric mixer to cream the softened butter with the granulated sugar until the mixture is light and fluffy. This aeration helps create tender cookies.
- Add egg and extracts: Beat in the egg, then stir in the vanilla extract and peppermint extract until well combined, infusing the dough with rich flavor and refreshing mint.
- Combine dry and wet: Gradually add the dry ingredients to the wet ingredients, mixing on low speed just until a soft dough forms. Avoid overmixing to keep the cookies tender and prevent toughness.
- Divide and color dough: Split the dough into two equal parts. Leave one portion plain, and add red gel food coloring to the other half. Mix thoroughly to ensure an even, vibrant red color.
- Chill dough halves: Wrap each dough ball separately in plastic wrap and refrigerate for at least 30 minutes. This step firms the dough, making it easier to handle and preventing color bleeding.
- Roll out dough: On a lightly floured surface, roll the plain dough into a 10×12 inch rectangle about 1/4 inch thick. Repeat with the red dough, matching the same dimensions and thickness.
- Layer doughs: Carefully place the red dough rectangle on top of the plain dough, pressing gently to adhere them together evenly without trapping air.
- Form the dough log: Starting at one long edge, tightly roll the layered dough into a log. Press gently to remove any air pockets and ensure a consistently tight roll to maintain sharp swirls.
- Second chill: Wrap the dough log securely in plastic wrap and chill in the refrigerator for at least 2 hours, or until quite firm. This prevents the dough from squishing during slicing, preserving the swirl pattern.
- Prepare for baking: Preheat your oven to 375°F (190°C). Line baking sheets with parchment paper for easy cleanup and to prevent sticking.
- Coat the log: Remove the dough log from the refrigerator. Optionally, lightly brush it with water or a whisked egg white, then roll it in coarse sugar or crushed peppermint candies to coat evenly for a festive crunch.
- Slice cookies: Using a sharp knife, carefully slice the dough log into 1/4 inch thick rounds. Arrange the slices about 1 inch apart on the prepared baking sheets to allow for slight spreading.
- Bake: Bake the cookies for 8 to 10 minutes until the edges turn lightly golden. Be careful not to overbake as the cookies should remain tender with a slight crisp at the edges.
- Cool: Let the cookies cool on the baking sheets for a few minutes to set, then transfer them to a wire rack to cool completely before serving or storing.
Notes
- Chilling the dough twice is essential for sharp, beautiful swirls and easy handling.
- Use gel food coloring for the most vibrant color without altering the dough’s consistency.
- If you prefer less sweetness, reduce the coarse sugar or crushed peppermint candy coating.
- Store cookies in an airtight container at room temperature for up to one week.
- For a more intense peppermint flavor, increase peppermint extract slightly, but be cautious as too much can be overpowering.
- These cookies freeze well—wrap slices before baking for easy-to-bake treats anytime.
Keywords: peppermint cookies, swirl cookies, holiday cookies, sugar cookies, peppermint extract, festive cookies, red and white cookies, Christmas cookies