Mini Pumpkin Pies Recipe
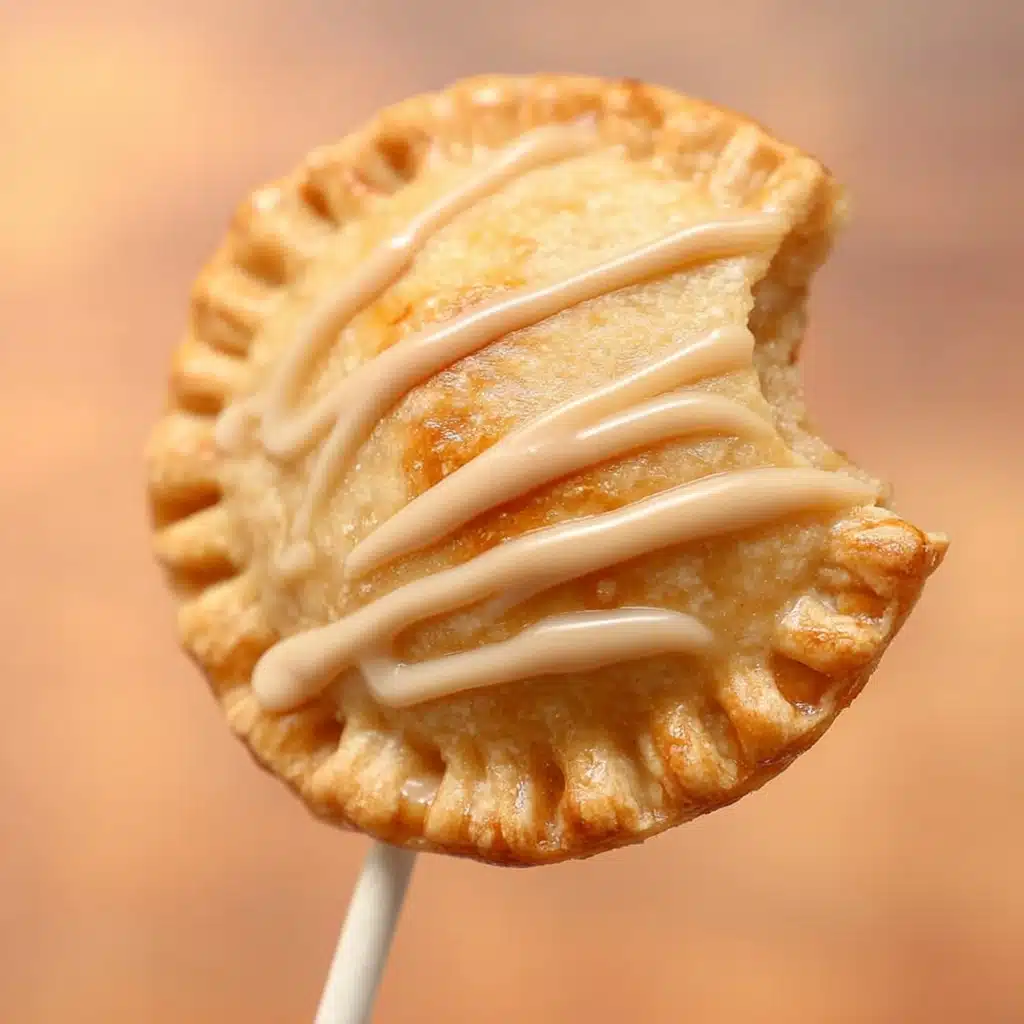
If you’re searching for an adorable fall treat that’s bursting with cozy flavors, these Mini Pumpkin Pies are exactly what you need. Perfectly portioned and packed with pumpkin goodness, they capture the spirit of the season in every bite. Imagine tender, flaky crust embracing a warm, spiced pumpkin filling, all topped off with a delicate maple glaze that brings just the right touch of sweetness. These little pies aren’t just a dessert; they’re a celebration of autumn’s best moments, making them a fantastic conversation starter at any gathering or a charming snack to enjoy with your favorite cup of tea. Trust me, once you try these Mini Pumpkin Pies, they’ll become a beloved staple in your seasonal baking repertoire.

Ingredients You’ll Need
Creating these Mini Pumpkin Pies is a delightful experience thanks to a handful of simple yet essential ingredients. Each one plays a starring role, from the creamy pumpkin puree that brings the earthy flavor, to the warming pumpkin pie spice that adds that classic autumn touch, and the maple syrup which offers a natural, rich sweetness that ties everything together beautifully.
- Deep Dish Frozen Pie Crusts (2, 9 inch): These provide a buttery, flaky base that’s easy to work with and crisps up perfectly in the oven.
- Pumpkin Puree (1/2 cup): The heart of the filling, delivering smooth texture and unmistakable pumpkin flavor.
- Brown sugar (1/4 cup): Adds a deep caramel sweetness that complements the pumpkin perfectly.
- Maple Syrup (1 Tablespoon plus extra for glaze): Infuses the filling and glaze with a signature fall sweetness and subtle complexity.
- Pumpkin pie spice (1/4 teaspoon): A warm blend of cinnamon, nutmeg, and cloves that wakes up the taste buds.
- Egg (1, beaten): Used for brushing the crust to achieve that gorgeous golden finish.
- Lollipop Sticks (6, optional): Add a fun, whimsical way to hold your Mini Pumpkin Pies if you want a festive twist.
- Icing Sugar (1/2 cup): The base for the sweet, glossy glaze that gently crowns each pie.
- Vanilla Extract (1/2 teaspoon): Enhances the glaze with a creamy, fragrant hint that balances all the flavors.
How to Make Mini Pumpkin Pies
Step 1: Prepare the Pie Crust
Start by taking the frozen pie crusts out of the freezer and letting them thaw on the counter for about an hour. This softens the dough just enough so it’s easy to roll out without cracking. Once ready, remove them from their tins and roll the dough flat with a rolling pin. Using a pumpkin-shaped cookie cutter, cut out as many pumpkins as you can — this little festive detail adds charm and cuts down on extra mess.
Step 2: Mix the Pumpkin Filling
While your dough rests, whisk together the pumpkin puree, brown sugar, maple syrup, and pumpkin pie spice in a small bowl. This combination forms the aromatic and sweet filling with a perfect balance of spice and earthy richness that makes Mini Pumpkin Pies so irresistible.
Step 3: Assemble the Pies with a Touch of Fun
On a baking sheet lined with parchment paper or a silicone mat, lay out half of your pumpkin cutouts. Brush each with the beaten egg to help everything stick together and develop a glossy crust. If you want to go the extra mile, gently press a lollipop stick into each shape — pushing in about an inch — which makes these pies wonderfully portable and festive.
Step 4: Fill and Seal
Next, spoon a small dollop of the pumpkin mixture onto the center of each egg-brushed pumpkin shape, careful to leave some space around the edges for sealing. Take the remaining pumpkin cutouts and carefully press them on top. Using your fingers and then the tines of a fork, crimp around the edges tightly to seal in that delicious filling, ensuring the pies don’t leak during baking.
Step 5: Bake to Perfection
Brush the tops of your assembled pies with the beaten egg and pop them in the oven at 350°F. Bake for 20 to 25 minutes or until the crust turns a beautiful golden brown. The smell wafting from your oven at this stage is like pure autumn magic.
Step 6: Prepare the Maple Glaze
While the pies are baking, whisk together the icing sugar, vanilla extract, and maple syrup in a small bowl. Add the syrup one tablespoon at a time until you get a slightly runny glaze. Pour this mixture into a ziplock bag, seal it, and snip a tiny corner to create a piping bag. Once your pies cool just enough, drizzle the glaze artistically over each Mini Pumpkin Pie — this glossy finish adds a lovely sweetness and visual appeal.
How to Serve Mini Pumpkin Pies
Garnishes
There are so many lovely ways to dress up your Mini Pumpkin Pies when serving. A dusting of cinnamon or a pinch of finely chopped toasted pecans can bring some crunchy texture and nutty flavor that contrast wonderfully with the soft filling. You can also dollop a spoonful of whipped cream or a scoop of vanilla ice cream alongside for an indulgent treat.
Side Dishes
Mini Pumpkin Pies are fantastic on their own, but if you’re creating a festive spread, pair them with spiced apple cider or warm chai tea to amplify those trademark fall flavors. For a brunch, these pies shine next to a fresh fruit salad or a spinach and feta quiche, providing a sweet finale that rounds out the meal perfectly.
Creative Ways to Present
Presenting your Mini Pumpkin Pies can be just as fun as making them. Arrange them on a rustic wooden board decorated with autumn leaves, small gourds, or cinnamon sticks for an inviting tablescape. If you included lollipop sticks, stand the pies upright in a pumpkin-shaped bowl filled with dried beans or rice for an unexpected pop of whimsy that both kids and adults will adore.
Make Ahead and Storage
Storing Leftovers
If you find yourself with extra pies (which is not unlikely), store them in an airtight container in the refrigerator. They’ll stay fresh for about 3 to 4 days, letting you enjoy the warm flavors of fall even on busy days.
Freezing
Mini Pumpkin Pies freeze beautifully. To extend their life, flash freeze the pies on a baking sheet until solid, then transfer them to a freezer-safe bag or container. They can be kept frozen for up to 2 months — perfect for prepping ahead of a big event or holiday gathering.
Reheating
To bring back that freshly-baked charm, reheat the pies in a 325°F oven for about 10 minutes if thawed, or 20 to 25 minutes if frozen. Avoid the microwave to keep the crust flaky and crisp. Add a quick drizzle of fresh glaze after warming for that just-made glow.
FAQs
Can I use homemade pie crust instead of frozen?
Absolutely! Homemade pie crust adds a lovely personal touch and can be made as flaky or as buttery as you like. Just roll it out to the appropriate thickness for cutting your pumpkin shapes. Using homemade crust might require a bit more prep time, but the delicious payoff is well worth it.
What if I don’t have pumpkin pie spice on hand?
No problem! You can easily make your own blend using cinnamon, nutmeg, ginger, and cloves in small amounts. This way, you control the spice balance, customizing it to your taste while still getting that quintessential fall flavor.
Are the lollipop sticks necessary?
Not at all. The lollipop sticks are an optional fun addition that make these pies easy to hold and serve, especially at parties or for kids. If you prefer to keep them traditional, simply skip this step and bake the pies as cute little hand pies instead.
Can these Mini Pumpkin Pies be made gluten-free?
Yes! Swap the frozen pie crust with a gluten-free variety available in stores or make your own using gluten-free flour blends. Just be sure the crust dough is sturdy enough to hold the filling without cracking.
How sweet are these Mini Pumpkin Pies?
These pies have a gentle, natural sweetness from the maple syrup and brown sugar. The glaze adds a delicate finishing touch of extra sweet, but nothing too overwhelming. If you prefer sweeter desserts, you can easily increase the maple syrup slightly or add a dusting of powdered sugar before serving.
Final Thoughts
Making Mini Pumpkin Pies is such a joyful way to welcome the season’s flavors into your kitchen. Whether you’re baking for a crowd or just treating yourself, these little delights bring warmth, sweetness, and a hint of nostalgia with every bite. I encourage you to try this recipe soon — it’s a fun project that results in a stunning, tasty treat sure to make your fall celebrations extra special.
PrintMini Pumpkin Pies Recipe

These Mini Pumpkin Pies are adorable, delicious, and perfect for fall gatherings. Using deep dish frozen pie crusts shaped into pumpkins, they are filled with a sweet, spiced pumpkin mixture and baked to golden perfection. Finished with a maple glaze drizzle, these bite-sized treats combine classic autumn flavors with a fun presentation that everyone will love.
- Prep Time: 20 minutes
- Cook Time: 23 minutes
- Total Time: 43 minutes
- Yield: 12 mini pumpkin pies 1x
- Category: Dessert
- Method: Baking
- Cuisine: American
- Diet: Vegetarian
Ingredients
Pie Crust
- 2 Deep Dish Frozen Pie Crusts (9 inch)
Pumpkin Filling
- 1/2 cup Pumpkin Puree
- 1/4 cup Brown Sugar
- 1 Tablespoon Maple Syrup
- 1/4 teaspoon Pumpkin Pie Spice
- 1 Egg (beaten, divided)
Additional
- 6 ” Lollipop Sticks (optional)
Glaze
- 1/2 cup Icing Sugar
- 1/2 teaspoon Vanilla Extract
- 2 to 4 Tablespoons Maple Syrup
Instructions
- Defrost pie crusts: Remove the frozen pie crusts from the freezer and allow them to defrost on the counter for about one hour until pliable.
- Prepare pie crust shapes: Remove the pie crusts from their tins and roll them flat with a rolling pin. Using a pumpkin-shaped cookie cutter, cut out pumpkin shapes from the dough.
- Preheat oven: Preheat your oven to 350°F (175°C) to prepare for baking the pies.
- Mix pumpkin filling: In a small bowl, combine pumpkin puree, brown sugar, maple syrup, and pumpkin pie spice. Stir well until evenly mixed.
- Assemble bottom crusts and brush with egg: Arrange half of the pumpkin dough shapes on a parchment-lined baking sheet. Brush each with a thin layer of beaten egg to help seal the pies later.
- Add lollipop sticks: Gently press the lollipop sticks into the bottom pumpkin shapes, inserting at least one inch into the dough so they are secure.
- Add pumpkin filling: Spoon a small amount of the pumpkin mixture onto the center of each bottom pumpkin shape over the lollipop stick, leaving about half an inch border for sealing.
- Top and seal pies: Place the remaining pumpkin shapes on top of the filled bottom pieces. Press edges together gently with your fingers, then firmly crimp with a fork to seal completely.
- Brush tops with egg: Lightly brush the tops of the sealed mini pumpkin pies with the remaining beaten egg to promote browning.
- Bake: Bake the pies in the preheated oven for 20 to 25 minutes, or until golden brown and cooked through. (Typically done around 23 minutes).
- Prepare glaze: While pies bake, mix icing sugar and vanilla extract in a small bowl. Gradually add maple syrup, one tablespoon at a time, stirring until the glaze has a slightly runny consistency.
- Decorate pies: Transfer the glaze to a zip lock bag, seal it, and snip off a small corner. Drizzle the glaze over the cooled mini pumpkin pies for a sweet finishing touch.
Notes
- Allow pie crusts to defrost properly to avoid cracking when rolling and cutting shapes.
- Lollipop sticks are optional but make these mini pies fun to serve like pumpkin pie pops.
- You can adjust the pumpkin pie spice or sugar levels according to your taste preferences.
- Use parchment paper or a silicone baking mat to prevent sticking during baking and make cleanup easier.
- Let pies cool slightly before glazing to prevent melting the icing sugar glaze.
- Store leftovers covered at room temperature for up to 2 days, or refrigerate for up to 4 days.
Nutrition
- Serving Size: 1 mini pumpkin pie
- Calories: 150
- Sugar: 10g
- Sodium: 120mg
- Fat: 7g
- Saturated Fat: 3g
- Unsaturated Fat: 3.5g
- Trans Fat: 0g
- Carbohydrates: 20g
- Fiber: 2g
- Protein: 2g
- Cholesterol: 40mg
Keywords: mini pumpkin pies, pumpkin pie pops, fall dessert, pumpkin puree dessert, bite-sized pies, Halloween dessert