Gluten Free Red Velvet Cupcakes with Buttercream Icing Recipe
Introduction
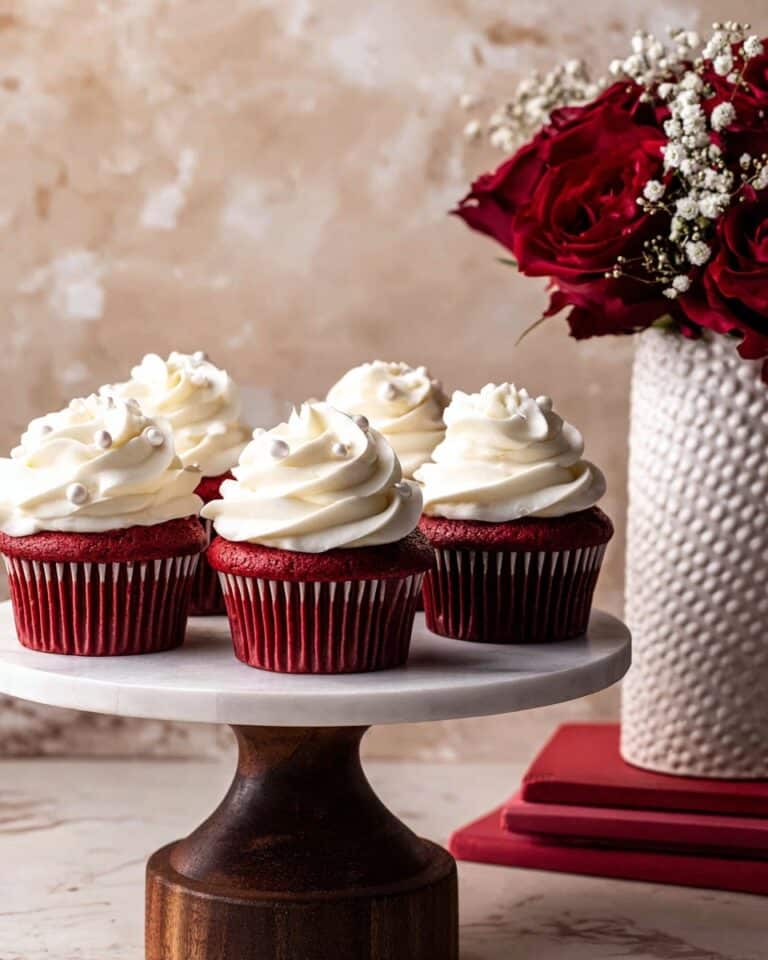
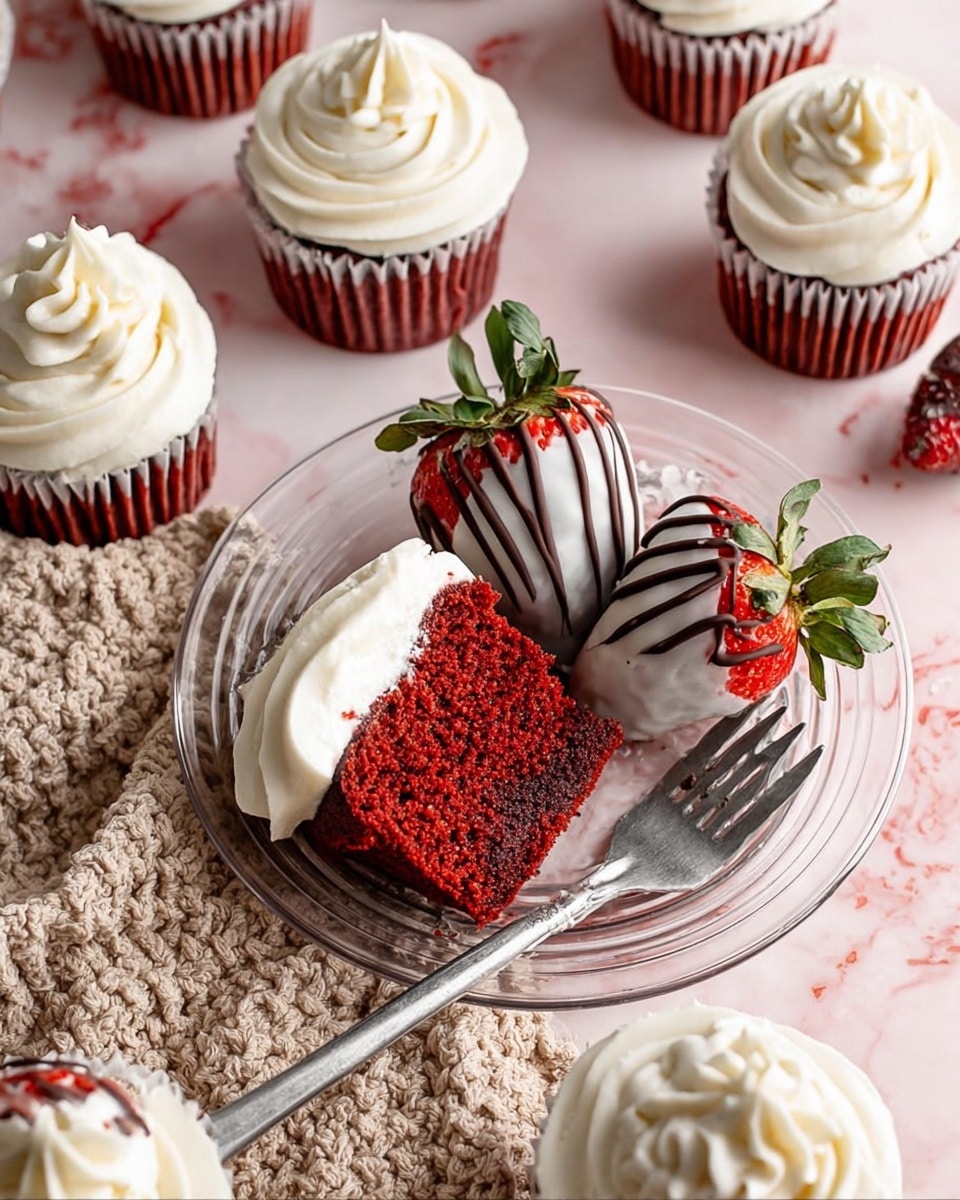
These Gluten Free Red Velvet Cupcakes with Buttercream Icing deliver a classic treat without gluten, perfect for celebrations or everyday indulgence. Moist, vibrant, and topped with a luscious buttercream, they’re sure to delight everyone at the table.
Ingredients
- 1 1/2 cups 1-to-1 gluten-free flour blend*
- 1/2 cup almond flour
- 3 tablespoons cocoa powder (unsweetened)
- 1 1/2 teaspoons baking powder
- 1/2 teaspoon baking soda
- 1/4 teaspoon salt
- 3/4 cup coconut sugar or regular sugar*
- 3 large eggs
- 1/2 cup melted butter
- 1/2 cup buttermilk*
- 2-3 teaspoons red gel coloring
- 2 sticks unsalted butter (1 cup)
- 1/3 cup all-vegetable shortening (e.g., Spectrum)
- 5 1/2 to 6 cups powdered sugar
- 1 1/2 teaspoons pure vanilla extract
- 3-4 tablespoons heavy cream or whole milk
- Pinch of salt
Instructions
- Step 1: Preheat your oven to 350°F. Line a 12-cup muffin tin with paper liners.
- Step 2: In a bowl, combine the gluten-free flour blend, almond flour, cocoa powder, baking powder, baking soda, and salt. Mix well to combine all the dry ingredients.
- Step 3: In a large mixing bowl, add the sugar, eggs, buttermilk, and melted butter. Using an electric mixer or stand mixer fitted with a paddle attachment, beat until smooth and well combined.
- Step 4: Add the red gel coloring to the wet mixture and mix thoroughly.
- Step 5: Gently fold in the dry ingredients until the batter is evenly combined. Be careful not to overmix.
- Step 6: Divide the batter evenly among the lined muffin cups, filling each about 3/4 full.
- Step 7: Bake for 18-22 minutes, or until the cupcake tops spring back when lightly touched.
- Step 8: Let the cupcakes cool in the muffin tin for approximately 10 minutes, then transfer to a wire rack to cool completely, about 30 minutes.
- Step 9: For the buttercream frosting, place the butter and vegetable shortening in a stand mixer. Beat on medium speed until light and fluffy.
- Step 10: Gradually add the powdered sugar and vanilla extract while continuing to beat. Once all powdered sugar is incorporated, beat for another 40 seconds until the frosting is fluffy and stiff.
- Step 11: Add the heavy cream or milk, a tablespoon at a time, to reach your desired frosting consistency. Add a pinch of salt and beat briefly to combine.
- Step 12: Frost the cooled cupcakes using a piping bag or a knife. Serve and enjoy!
Tips & Variations
- Use a 1-to-1 gluten-free flour blend that includes xanthan gum for the best texture.
- Substitute coconut sugar with regular granulated sugar if preferred.
- For a dairy-free version, replace butter with coconut oil and use a plant-based milk alternative in the frosting.
- Adjust the red gel coloring to get the desired intensity of red—start with less and add more if needed.
Storage
Store cupcakes in an airtight container at room temperature for up to 2 days. For longer storage, keep them refrigerated for up to 4 days. Allow refrigerated cupcakes to come to room temperature before serving. You can also freeze unfrosted cupcakes in a sealed container for up to 3 months; thaw completely before frosting and serving.
How to Serve
Serve this delicious recipe with your favorite sides.
FAQs
Can I use regular flour instead of gluten-free flour?
Yes, you can substitute with regular all-purpose flour if gluten is not a concern. The texture may be slightly different but still delicious.
How do I make buttermilk if I don’t have any?
To make a buttermilk substitute, add 1/2 tablespoon of lemon juice or white vinegar to 1/2 cup of milk. Let it sit for 5 minutes before using.
PrintGluten Free Red Velvet Cupcakes with Buttercream Icing Recipe

These Gluten Free Red Velvet Cupcakes with Buttercream Icing offer a deliciously moist and tender texture while catering to gluten-free diets. Made with a blend of gluten-free flours, cocoa, and a vibrant red gel coloring, these cupcakes are topped with a smooth, creamy buttercream frosting that perfectly balances sweetness. Ideal for celebrations or any sweet tooth craving, these cupcakes deliver classic red velvet flavor without compromising dietary needs.
- Prep Time: 20 minutes
- Cook Time: 20 minutes
- Total Time: 50 minutes
- Yield: 12 cupcakes 1x
- Category: Dessert
- Method: Baking
- Cuisine: American
- Diet: Gluten Free
Ingredients
Cupcakes
- 1 1/2 cups 1-to-1 gluten-free flour blend*
- 1/2 cup almond flour
- 3 tablespoons unsweetened cocoa powder
- 1 1/2 teaspoons baking powder
- 1/2 teaspoon baking soda
- 1/4 teaspoon salt
- 3/4 cup coconut sugar or regular sugar*
- 3 large eggs
- 1/2 cup melted butter
- 1/2 cup buttermilk*
- 2–3 teaspoons red gel coloring
Buttercream Frosting
- 2 sticks unsalted butter (1 cup)
- 1/3 cup all-vegetable shortening (e.g., Spectrum)
- 5 1/2 to 6 cups powdered sugar
- 1 1/2 teaspoons pure vanilla extract
- 3–4 tablespoons heavy cream or whole milk
- Pinch of salt
Instructions
- Preheat and prepare muffin tins: Preheat your oven to 350°F (175°C). Line a 12-cup muffin tin with paper liners to prevent sticking and make for easy cleanup.
- Mix dry ingredients: In a bowl, whisk together the gluten-free flour blend, almond flour, cocoa powder, baking powder, baking soda, and salt until evenly combined.
- Mix wet ingredients: In a large mixing bowl, add the coconut or regular sugar, eggs, buttermilk, and melted butter. Using an electric mixer or stand mixer with a paddle attachment, beat until the mixture is smooth and well combined. Stir in the red gel food coloring to achieve a vibrant red color.
- Combine wet and dry ingredients: Gently fold the dry mix into the wet ingredients until evenly incorporated. Be careful not to overmix to keep the cupcakes tender.
- Fill muffin liners and bake: Spoon the batter into the lined muffin cups, filling each about three-quarters full. Place in the preheated oven and bake for 18 to 22 minutes, or until the tops spring back when lightly touched and a toothpick inserted comes out clean.
- Cool cupcakes: Allow cupcakes to cool in the muffin tins for about 10 minutes. Then, transfer them to a wire rack to cool completely, approximately 30 minutes, before frosting.
- Prepare buttercream frosting: In a stand mixer, beat together the unsalted butter and vegetable shortening on medium speed until fluffy and well combined.
- Add vanilla and sugar: Gradually add the pure vanilla extract along with the powdered sugar to the butter mixture. Beat on medium-high speed for about 40 seconds or until the frosting becomes fluffy and stiff. If needed, add heavy cream or milk a tablespoon at a time to achieve desired consistency. Finish by mixing in a pinch of salt to balance the sweetness.
- Frost cupcakes: Once the cupcakes have completely cooled, generously frost them with the prepared buttercream icing using a spatula or piping bag.
Notes
- Use a 1-to-1 gluten-free flour blend that contains xanthan gum or add 1/2 teaspoon xanthan gum if your blend does not contain it to give the cupcakes structure.
- Coconut sugar can be substituted with regular granulated sugar or brown sugar depending on preference.
- Buttermilk can be made by adding 1/2 tablespoon vinegar or lemon juice to 1/2 cup milk; let it sit for 5 minutes before use.
- The quantity of red gel coloring can be adjusted to achieve the desired shade of red.
- For a dairy-free version, substitute butter and heavy cream with appropriate plant-based alternatives.
- Ensure cupcakes are completely cooled before frosting to prevent the buttercream from melting.
- Store cupcakes in an airtight container at room temperature for up to 3 days or refrigerate for longer freshness.
Keywords: Gluten Free Red Velvet Cupcakes, Red Velvet Cupcakes, Buttercream Frosting, Gluten Free Dessert, Gluten Free Baking