Stuffed Dates with Peanut Butter & Chocolate Recipe
Introduction
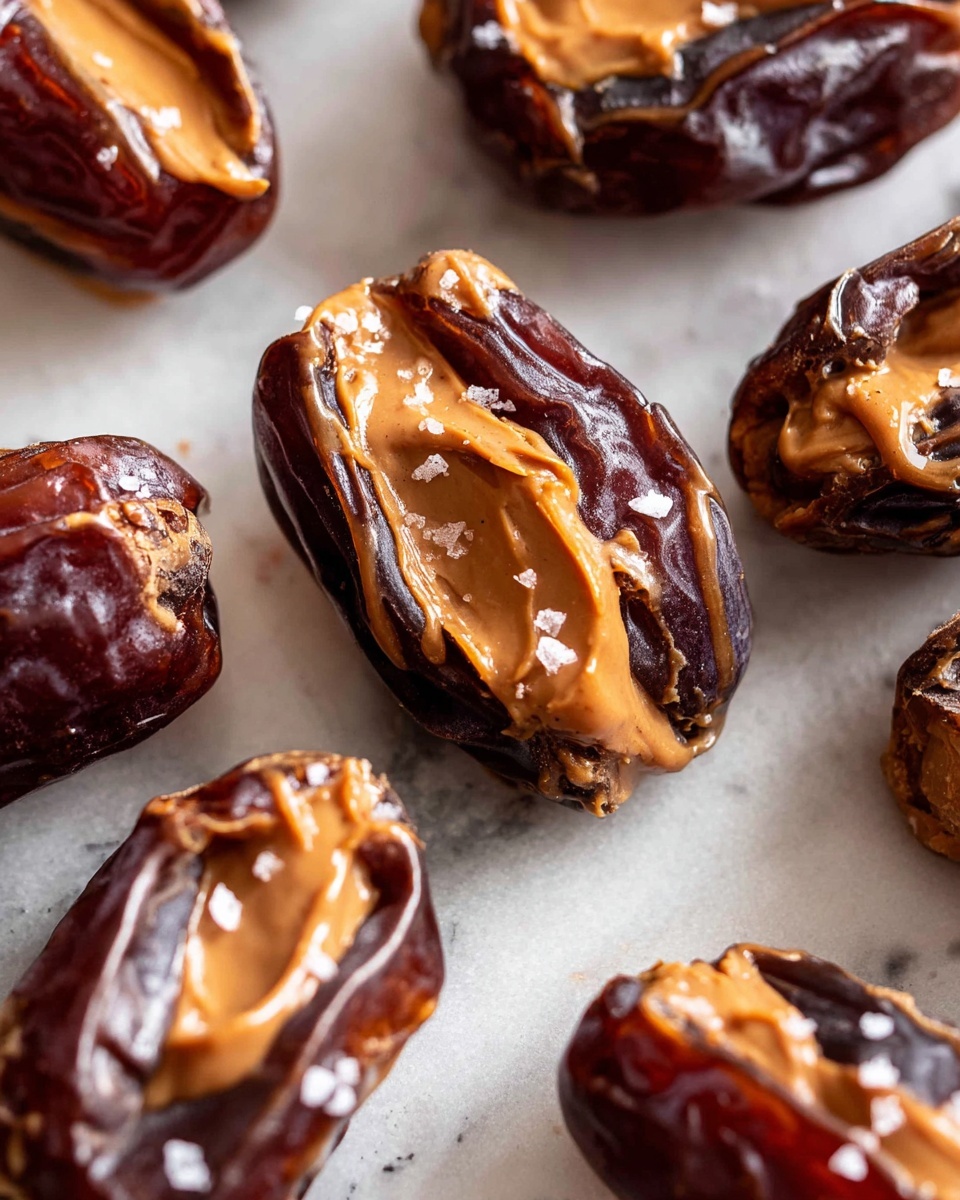
These stuffed dates with peanut butter and chocolate make a delightful sweet treat that’s both simple and satisfying. Combining the natural sweetness of medjool dates with creamy peanut butter and rich chocolate creates a perfect bite-sized snack.
Ingredients
- 20 medjool dates
- ⅓ cup peanut butter (80g) – may need slightly more if dates are large
- ¼ cup coconut oil (50g)
- ¼ cup cacao or cocoa powder (15g)
- Sea salt flakes
- ½ cup dark chocolate or chocolate chips (70g)
Instructions
- Step 1: Line a large baking tray with parchment paper to prevent the dates from sticking.
- Step 2: Slice open each date and remove the pit. Arrange the dates on the prepared tray.
- Step 3: Spoon just under 1 teaspoon of peanut butter into the center of each date.
- Step 4: To make the chocolate coating, melt the coconut oil in a small bowl in the microwave for 30 seconds or using a double boiler. Stir in the cacao or cocoa powder until fully combined. If using pre-made chocolate, break it into pieces and microwave until melted.
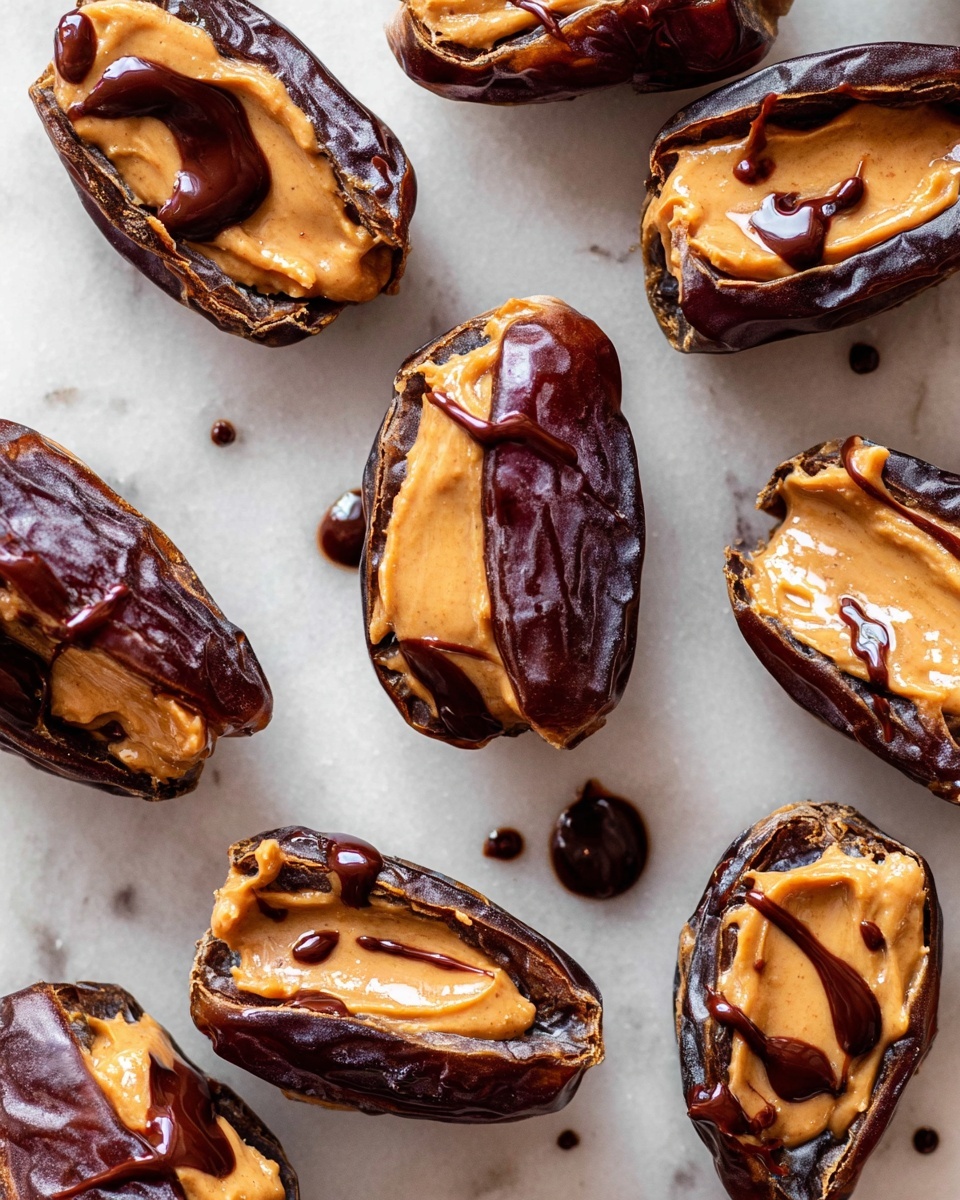
- Step 5: Allow the chocolate to cool slightly, then drizzle it over the stuffed dates or dip the dates directly into the chocolate. Sprinkle with sea salt flakes if desired.
- Step 6: Refrigerate the dates until the chocolate hardens, about 20 minutes, before serving.
Tips & Variations
- Try swapping peanut butter for almond or cashew butter for a different nutty flavor.
- Add a pinch of cinnamon or chili powder to the chocolate for a spicy twist.
- Use white or milk chocolate if you prefer a sweeter coating.
- For extra texture, sprinkle chopped nuts or shredded coconut on top before the chocolate sets.
Storage
Store the stuffed dates in an airtight container in the refrigerator for up to one week. To enjoy, let them sit at room temperature for a few minutes or eat them chilled. They also freeze well for up to one month; simply thaw before serving.
How to Serve
Serve this delicious recipe with your favorite sides.
FAQs
Can I use other types of dates?
Yes, but medjool dates are preferred because they are soft, large, and naturally sweet, making them easier to stuff and more flavorful.
How do I prevent the chocolate from melting too quickly?
Make sure the chocolate is fully hardened by refrigerating before handling. Keep the stuffed dates stored in the fridge, especially in warm environments.
PrintStuffed Dates with Peanut Butter & Chocolate Recipe

Delicious and easy-to-make stuffed Medjool dates filled with creamy peanut butter and coated with rich, homemade chocolate. Perfect for a sweet and healthy snack or a simple dessert.
- Prep Time: 10 minutes
- Cook Time: 5 minutes
- Total Time: 15 minutes
- Yield: 20 stuffed dates 1x
- Category: Dessert
- Method: No-Cook
- Cuisine: Western
- Diet: Gluten Free
Ingredients
Dates and Filling
- 20 Medjool dates
- ⅓ cup peanut butter (80g) – may need slightly more if dates are large
- Sea salt flakes (optional, for sprinkling)
Chocolate Coating
- ¼ cup coconut oil (50g)
- ¼ cup cacao or cocoa powder (15g)
- ½ cup dark chocolate or chocolate chips (70g)
Instructions
- Prepare the baking tray: Line a large baking tray with parchment paper to prevent the dates from sticking during preparation and chilling.
- Prepare the dates: Slice open each Medjool date lengthwise and carefully remove the pits. Place the pitted dates on the prepared baking tray.
- Stuff the dates: Spoon just under 1 teaspoon of peanut butter into the center cavity of each date, filling them evenly.
- Make the chocolate coating: In a small bowl, add the coconut oil and microwave for 30 seconds until melted, or melt it gently over a double boiler. Stir the cacao or cocoa powder into the melted coconut oil until fully combined, creating a smooth chocolate mixture. Alternatively, if using pre-made dark chocolate or chocolate chips, break them into pieces and microwave for 30 seconds until melted.
- Coat the dates: Allow the chocolate mixture to cool slightly so it’s not too hot, then either drizzle it over each stuffed date or dip the dates into the chocolate for a full coating. Optionally, sprinkle a few flakes of sea salt on top for enhanced flavor.
- Chill and set: Place the tray of chocolate-coated dates in the refrigerator and chill for about 20 minutes or until the chocolate has fully hardened and set.
Notes
- Use Medjool dates as they are larger and softer, making them ideal for stuffing.
- If peanut butter is too thick, slightly warm it to make stuffing easier.
- You can substitute peanut butter with almond butter or another nut butter if preferred.
- The chocolate coating can be adjusted in sweetness by choosing different types of cocoa powder or chocolate.
- Store leftover stuffed dates in an airtight container in the refrigerator for up to one week.
Keywords: stuffed dates, peanut butter, chocolate, healthy snack, no-bake dessert, gluten free dessert