Gluten-Free Hot Chocolate Cupcakes Recipe
Introduction
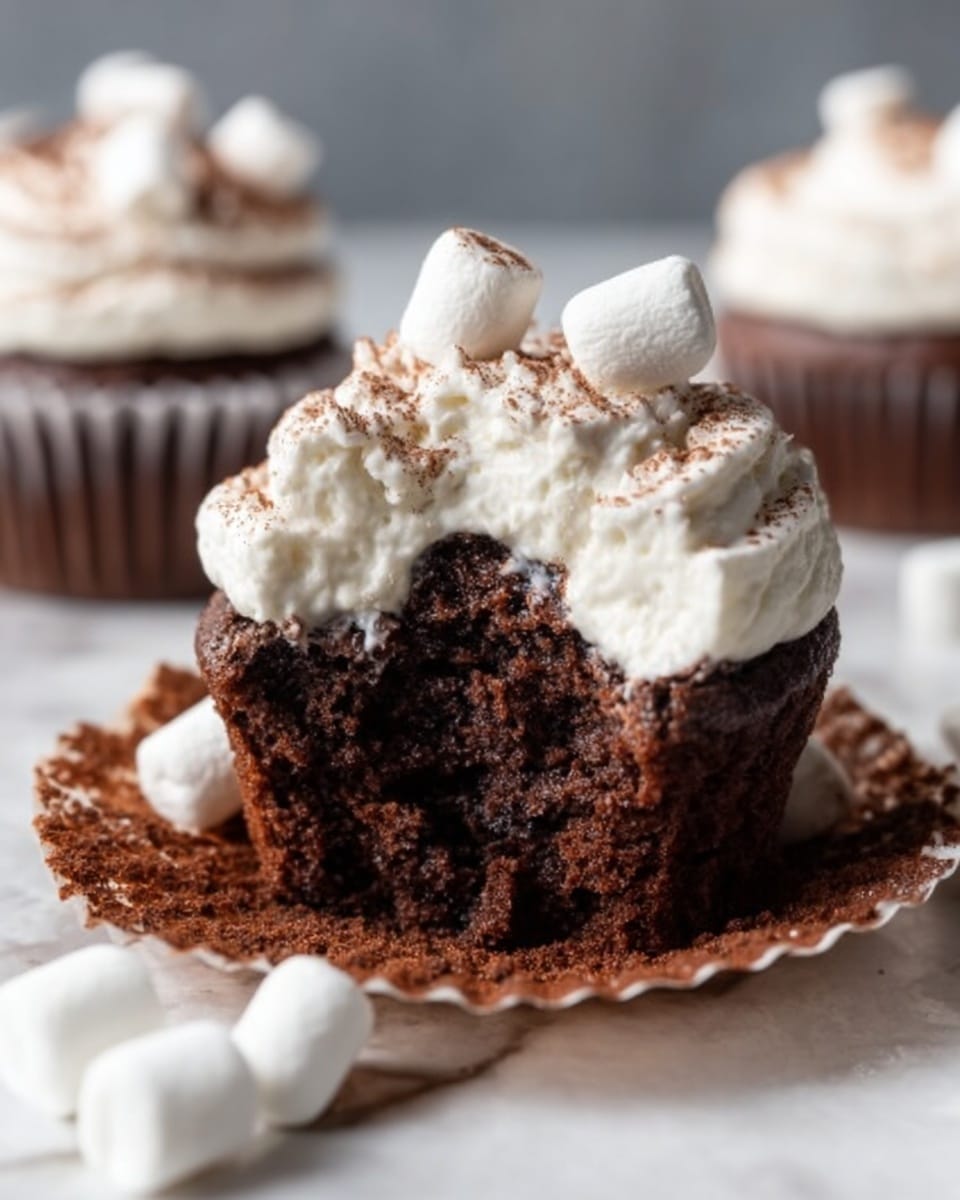
These Gluten-Free Hot Chocolate Cupcakes are a delightful treat perfect for anyone craving a rich, chocolatey dessert without gluten. Loaded with dairy-free ingredients, they’re ideal for those with dietary restrictions but still craving indulgence.
Ingredients
- 200 g caster sugar
- 160 g gluten free self raising flour
- 1/2 teaspoon baking powder
- 1/4 teaspoon xanthan gum (omit if your flour blend already contains this)
- 50 g cocoa powder
- 1/4 teaspoon salt
- 120 ml dairy free milk
- 2 medium eggs
- 1 teaspoon vanilla extract
- 60 g dairy free butter (melted)
- 100 ml hot coffee
- 12 teaspoons dairy free chocolate spread
- 200 g dairy free butter block
- 400 g icing sugar
- 1 teaspoon vanilla extract
- 1 tablespoon dairy free milk
- Handful mini marshmallows
- Cocoa powder (to dust)
- Mini Candy Canes (optional)
Instructions
- Step 1: Preheat your oven to 180°C and line a 12-hole cupcake tin with cupcake cases.
- Step 2: In a large bowl, mix together the caster sugar, gluten free self raising flour, baking powder, xanthan gum, cocoa powder, and salt.
- Step 3: In another bowl, whisk the dairy-free milk, eggs, vanilla extract, and melted dairy-free butter, then combine the wet ingredients with the dry mixture. Stir in the hot coffee and mix well until smooth.
- Step 4: Pour the batter evenly into the cupcake cases and bake for 20 minutes, or until a skewer inserted in the center comes out clean. Allow the cupcakes to cool completely.
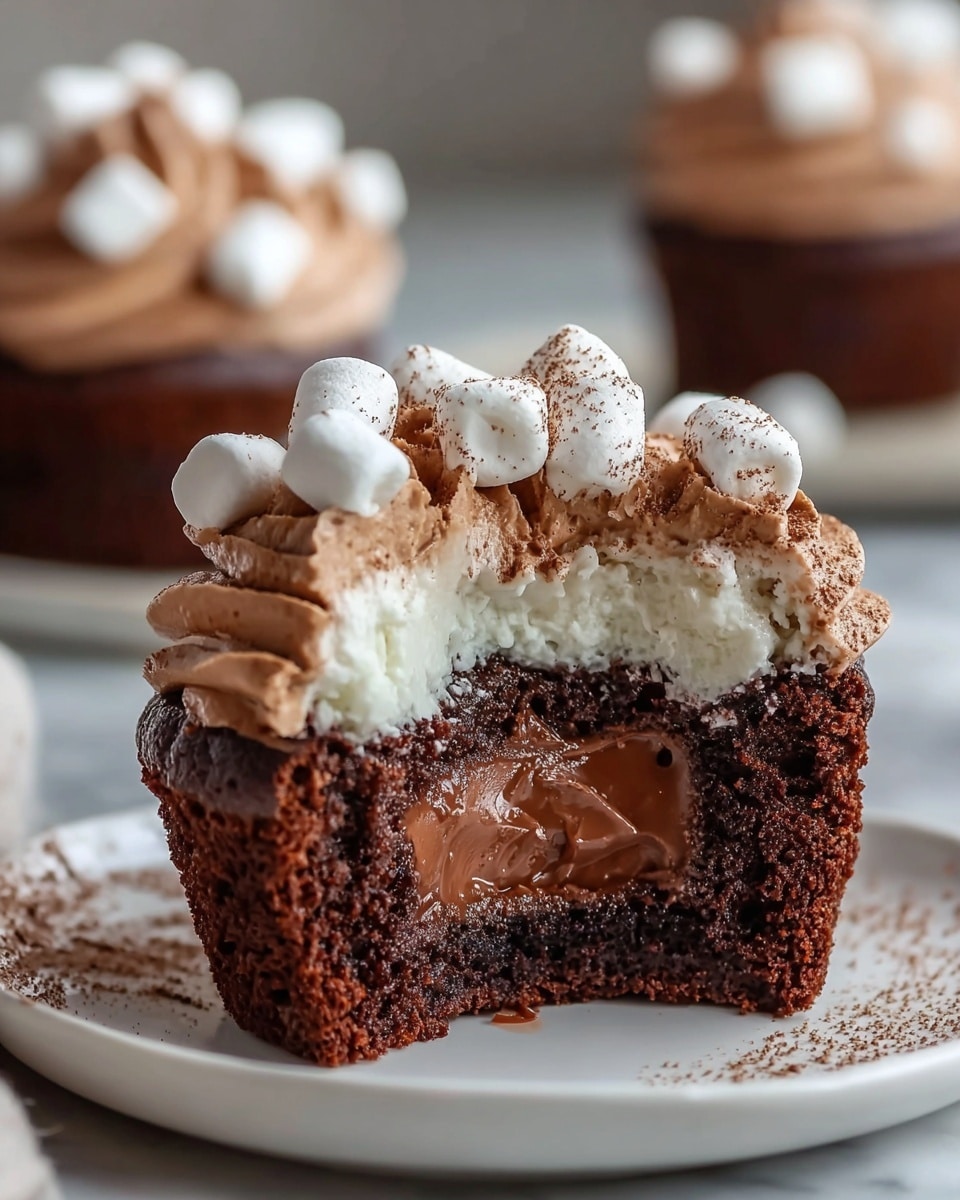
- Step 5: Once cooled, carefully cut a small hole in the top of each cupcake and fill with a teaspoon of dairy-free chocolate spread.
- Step 6: To make the buttercream, beat the dairy-free butter block until soft. Gradually add the icing sugar and continue beating for up to 5 minutes until creamy. Mix in vanilla extract and dairy-free milk, then beat again to combine.
- Step 7: Pipe the buttercream generously onto the cupcakes, then top with mini marshmallows, a light dusting of cocoa powder, and mini candy canes if using.
Tips & Variations
- Use room temperature ingredients for smoother batter and frosting.
- If you prefer, substitute the coffee with hot water or almond milk for a milder flavor.
- Swap mini marshmallows for dairy-free chocolate chips for extra chocolatey cupcakes.
- For a festive touch, add a sprinkle of cinnamon or nutmeg to the batter.
Storage
Store the cupcakes in an airtight container at room temperature for up to 3 days. If your environment is warm, keep them in the fridge and allow to come to room temperature before serving. The buttercream may firm up when chilled; to soften, let cupcakes sit out for 20 minutes or warm briefly in a low oven.
How to Serve
Serve this delicious recipe with your favorite sides.
FAQs
Can I make these cupcakes vegan?
Yes, by substituting the eggs with a vegan egg replacer (such as flax eggs) and ensuring all dairy-free products are vegan-friendly, these cupcakes can be made fully vegan.
What if I don’t have xanthan gum?
If your gluten-free flour blend already contains xanthan gum, you can omit it from the recipe. If not, it helps provide structure and elasticity, but leaving it out may result in a slightly crumblier cupcake.
PrintGluten-Free Hot Chocolate Cupcakes Recipe
These Gluten-Free Hot Chocolate Cupcakes are rich, moist, and perfect for a cozy treat. Made with dairy-free ingredients and topped with a luscious dairy-free buttercream, mini marshmallows, and cocoa dusting, they bring the comforting flavors of hot chocolate into a delightful cupcake form. Ideal for those with gluten intolerance or anyone craving a decadent, allergy-friendly dessert.
- Prep Time: 15 minutes
- Cook Time: 20 minutes
- Total Time: 35 minutes
- Yield: 12 cupcakes 1x
- Category: Dessert
- Method: Baking
- Cuisine: Western
- Diet: Gluten Free
Ingredients
Cupcakes
- 200 g caster sugar
- 160 g gluten free self raising flour
- 1/2 teaspoon baking powder
- 1/4 teaspoon xanthan gum (omit if your flour blend already contains this)
- 50 g cocoa powder
- 1/4 teaspoon salt
- 120 ml dairy free milk
- 2 medium eggs
- 1 teaspoon vanilla extract
- 60 g dairy free butter, melted
- 100 ml hot coffee
- 12 teaspoons dairy free chocolate spread
Buttercream Frosting
- 200 g dairy free butter block
- 400 g icing sugar
- 1 teaspoon vanilla extract
- 1 tablespoon dairy free milk
Toppings
- Handful mini marshmallows
- Cocoa powder (for dusting)
- Mini Candy Canes (optional)
Instructions
- Prepare Oven and Tin: Preheat your oven to 180°C (350°F) and line a 12-hole cupcake tin with cupcake cases to prevent sticking and ease removal.
- Combine Dry Ingredients: In a large mixing bowl, sift together caster sugar, gluten-free self-raising flour, baking powder, xanthan gum (if using), cocoa powder, and salt to ensure even distribution and remove lumps.
- Mix Wet Ingredients: In a separate bowl, whisk dairy-free milk, eggs, vanilla extract, and melted dairy-free butter until smooth and well combined.
- Combine Wet and Dry Mixtures: Gradually add the wet mixture into the dry ingredients, stirring until just combined. Then carefully add the hot coffee and mix thoroughly to create a smooth batter.
- Fill and Bake Cupcakes: Spoon the batter evenly into the cupcake cases, filling about 2/3 full. Bake in the preheated oven for about 20 minutes or until a skewer inserted into the center comes out clean. Remove and let cool completely on a rack.
- Fill Cupcakes: Once cooled, cut a small hole or remove a portion from the top center of each cupcake and fill with a teaspoon of dairy-free chocolate spread for a gooey surprise inside.
- Prepare Buttercream Frosting: Beat the dairy-free butter block until soft and creamy. Gradually add the icing sugar in increments, continuing to beat for up to 5 minutes until light and fluffy. Add vanilla extract and dairy-free milk and beat again until smooth and pipeable.
- Decorate Cupcakes: Use a piping bag to swirl the buttercream over each cupcake. Garnish with mini marshmallows, dust with cocoa powder, and optionally add mini candy canes for a festive touch.
- Storage: Store the cupcakes in an airtight container to keep them fresh for up to 3 days.
Notes
- Omit xanthan gum if your gluten-free flour blend already contains it to avoid excessive thickening.
- Dairy-free milk options can include almond, oat, soy, or coconut milk according to preference.
- Ensure the dairy-free butter and chocolate spread are suitable for your dietary requirements.
- Cupcakes are best eaten within 3 days to enjoy maximum freshness and moisture.
- Hot coffee enhances the chocolate flavor but can be substituted with hot water if preferred.
Keywords: gluten-free cupcakes, dairy-free cupcakes, hot chocolate cupcakes, allergy-friendly desserts, vegan-friendly cupcakes, chocolate cupcakes