Homemade Rainbow Sherbet Recipe
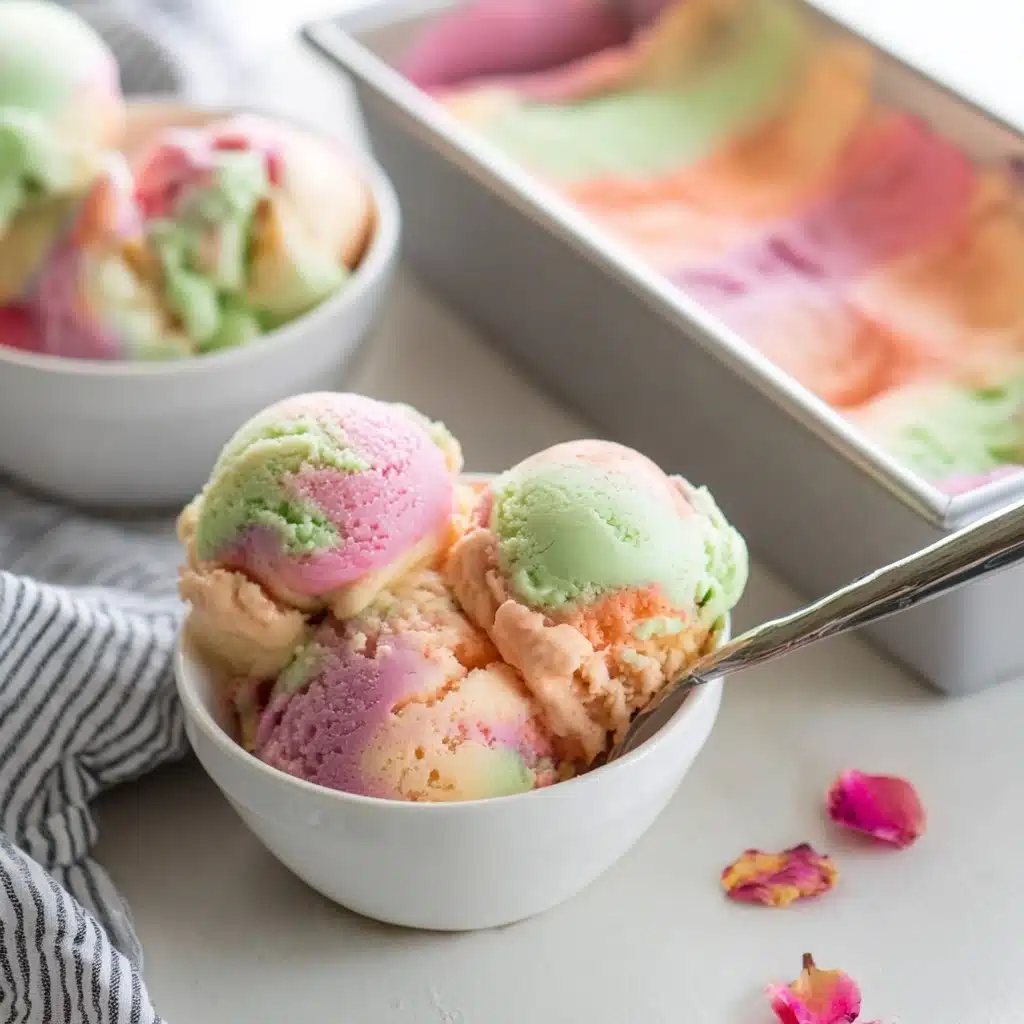
There is something truly magical about homemade frozen treats, and this Homemade Rainbow Sherbet captures that magic in every colorful, creamy bite. Bursting with vibrant hues and fresh, tangy fruit flavors, this sherbet is a playful twist on the classic summer dessert that feels both nostalgic and refreshingly new. Its smooth texture combined with zesty orange, bright lime, and sweet raspberry notes make it an irresistible treat you’ll want to make again and again. Plus, crafting this rainbow wonder at home means you get to control the sweetness and savor the freshest ingredients from start to finish.
Ingredients You’ll Need
Creating this delightful Homemade Rainbow Sherbet is surprisingly easy thanks to the few but essential ingredients. Each one plays a key role in building the rich texture, refreshing tang, and vibrant colors that make this sherbet so special.
- Heavy cream: Adds a luscious creaminess that makes the sherbet silky and smooth.
- Whole milk: Provides a lighter base that balances the richness of the cream perfectly.
- Granulated sugar: Sweetens the sherbet and helps achieve the right icy texture when frozen.
- Vanilla extract: Enhances the overall flavor with a gentle, warm aroma that ties everything together.
- Orange juice: Brings a bright citrus tang and natural sweetness to one colorful section of the sherbet.
- Lime juice: Offers a zesty punch with a refreshing tartness that contrasts beautifully with the cream.
- Raspberries: Lend a vibrant red color and a burst of fruity flavor that complements the citrus perfectly.
How to Make Homemade Rainbow Sherbet
Step 1: Prepare the Creamy Base
Begin by gently heating the heavy cream, whole milk, and 1 cup of the sugar in a saucepan over medium heat. Stir occasionally until the sugar dissolves completely, which takes about 5 to 7 minutes. This process helps infuse the dairy with sweetness and ensures the sherbet’s texture will be perfectly smooth. After removing the pan from the heat, stir in the vanilla extract to add depth and warmth to your base. Let the mixture cool completely before moving on to the next step.
Step 2: Create the Raspberry Puree
While the base cools, blend the fresh raspberries together with 2 tablespoons of sugar until smooth. To capture a silky texture free of seeds, strain this puree through a fine mesh sieve. This not only intensifies the vibrant pink-red color but also ensures every spoonful of your sherbet melts like a dream without any gritty bits.
Step 3: Churn the Base
Pour your cooled dairy base into an ice cream maker and churn it until it reaches a soft serve consistency. This step is key to creating that light, airy texture which contrasts beautifully with the rich fruit flavors that will be added next. Churning also helps incorporate air, giving the sherbet its delicate body.
Step 4: Divide and Flavor
Once churned, divide the base evenly into three separate portions. Add orange juice (and if desired, orange food coloring) to one portion to evoke sunny brightness. Add lime juice (and green food coloring if you wish) to another for a sharp, refreshing note. Fold the raspberry puree into the last portion, creating a lively red mixture bursting with berry goodness. These individual vibrant flavors form the heart of your Homemade Rainbow Sherbet.
Step 5: Layer and Freeze
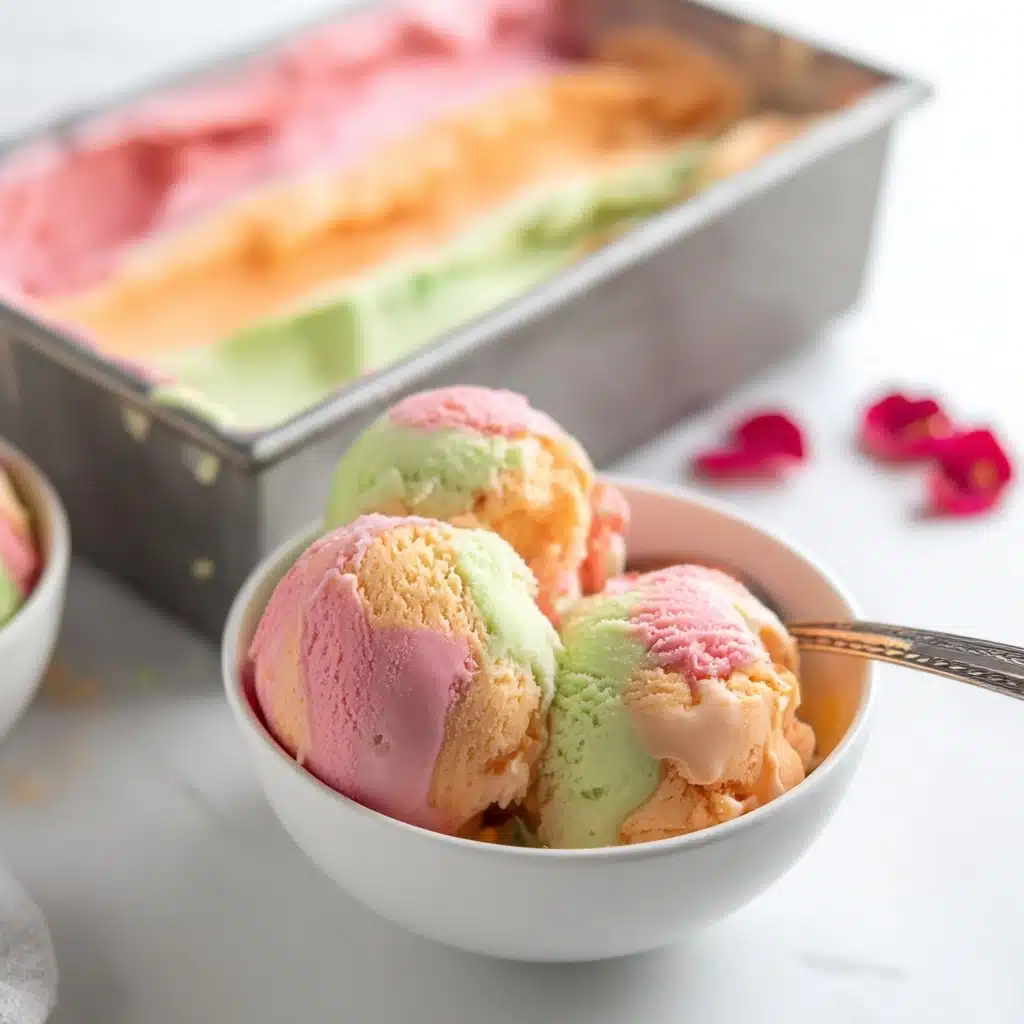
In a sturdy, freezer-safe container, carefully layer the three mixtures by alternating between raspberry, lime, and orange. This layering not only delivers on the visual rainbow promise but also lets each flavor shine distinctly in every bite. Cover the container and freeze for 4 to 6 hours or until firm. The anticipation during this wait is all part of the fun!
How to Serve Homemade Rainbow Sherbet
Garnishes
Presenting your sherbet with thoughtful garnishes elevates the experience. Fresh mint leaves add a fragrant freshness and a touch of green to contrast the sherbet’s colors nicely. A few whole raspberries or thin slices of lime and orange placed artfully around the bowl invite guests to enjoy the citrus and berry flavors even before the first spoonful. For a playful finish, rainbow sprinkles or edible flowers create whimsical accents and heighten the festive vibe.
Side Dishes
This sherbet shines effortlessly on its own but pairs wonderfully with light and refreshing side treats. Serve alongside crisp, buttery shortbread cookies or delicate angel food cake for an elegant contrast of textures. For a more indulgent option, offer sliced pound cake or a drizzle of warm chocolate sauce to balance the sherbet’s chilled tanginess. The key is to keep sides simple so the bold flavors of the sherbet take center stage.
Creative Ways to Present
Get a little creative by serving your rainbow sherbet in clear glasses or mason jars to showcase the distinct colorful layers. Using small cookie scoops to create neat, round balls stacked in a dessert coupe adds a charming effect. For an extra festive touch, consider shaping the sherbet into molds or popsicles using the layers for a portable, cooling summer treat. Presentation is a wonderful way to make enjoying Homemade Rainbow Sherbet even more delightful.
Make Ahead and Storage
Storing Leftovers
If you have any leftover Homemade Rainbow Sherbet, simply cover the container tightly with plastic wrap or an airtight lid and store it in the freezer. Proper sealing will protect the sherbet from absorbing unwanted odors and prevent ice crystals from forming, keeping the texture smooth and creamy for up to two weeks.
Freezing
This sherbet freezes beautifully thanks to the sugar and fruit content which help control ice crystallization. When you make it ahead, allow it to freeze fully in the layered container before serving. For best texture when thawing, remove it from the freezer 10–15 minutes before scooping to soften slightly, making those colorful layers easier to portion and scoop out.
Reheating
Unlike some other desserts, you never reheat sherbet. Instead, let it soften at room temperature briefly before serving to capture that perfect balance between firm and scoopable. Avoid leaving it out too long as it can melt quickly due to its lower fat content compared to traditional ice cream.
FAQs
Can I make Homemade Rainbow Sherbet without an ice cream maker?
Absolutely! While an ice cream maker makes churning easier and creates a smoother texture, you can still make sherbet by freezing the mixture in a shallow container and stirring vigorously every 30 minutes until it’s frozen. This mimics the churning process and helps prevent large ice crystals from forming.
Can I use other fruits instead of raspberries?
Definitely! This recipe is versatile. Try substituting raspberries with strawberries, blackberries, or even chopped mango for a different twist. Just puree and strain as needed to keep the sherbet smooth and consistent.
Is it possible to make this recipe dairy-free?
Yes, you can replace the heavy cream and whole milk with coconut milk or other plant-based milks, but the texture might be slightly less creamy. Adding a bit of coconut cream can help boost richness and keep that luscious mouthfeel in your Homemade Rainbow Sherbet.
How long does Homemade Rainbow Sherbet last in the freezer?
If stored properly in an airtight container, this sherbet will maintain its best quality for about two weeks. Beyond that, texture and flavor may start to degrade or become icy, so it’s best enjoyed fresh.
Can I make this sherbet less sweet?
Of course! Feel free to reduce the sugar a little when preparing the base and raspberry puree to suit your taste. Keep in mind that sugar also affects texture, so cutting too much might result in a harder, icier sherbet.
Final Thoughts
Making Homemade Rainbow Sherbet is like inviting a splash of sunshine and a burst of joy right into your kitchen. It’s a fun, vibrant treat that not only tastes incredible but also brings out your creative side in the layering and serving process. Whether enjoyed on a warm day or shared with friends and family, this sherbet has a way of sparking smiles and brightening any occasion. So grab your ingredients, your ice cream maker (or a freezer and spoon), and dive into the colorful adventure that is Homemade Rainbow Sherbet. You’ll be so glad you did!
Homemade Rainbow Sherbet Recipe

This vibrant Homemade Rainbow Sherbet recipe is a refreshing, fruity dessert that combines creamy dairy with citrus and raspberry flavors. Perfectly balanced between sweet and tangy, this sherbet is easy to make at home with simple ingredients and delivers a colorful treat ideal for hot days or festive gatherings.
- Prep Time: 15 minutes
- Cook Time: 10 minutes
- Total Time: 5 hours (including freezing)
- Yield: About 6 servings 1x
- Category: Dessert
- Method: Churning and Freezing
- Cuisine: American
- Diet: Vegetarian
Ingredients
Dairy Base
- 1 1/2 cups heavy cream
- 1 1/2 cups whole milk
- 1 3/4 cups granulated sugar (divided)
- 1 teaspoon vanilla extract
Fruit Juices and Puree
- 3/4 cup orange juice
- 1/2 cup lime juice
- 8 ounces raspberries
- Food coloring (orange and green, optional)
Instructions
- Prepare the base: In a medium saucepan, combine the heavy cream, whole milk, and 1 cup of the granulated sugar. Heat over medium heat, stirring occasionally, until the sugar is fully dissolved, which should take about 5 to 7 minutes. Remove the mixture from heat and stir in the vanilla extract. Allow the base to cool completely before proceeding.
- Make raspberry puree: In a blender, combine the raspberries with 2 tablespoons of the remaining sugar and blend until smooth. Strain this mixture through a fine mesh sieve to remove seeds and achieve a smooth puree.
- Churn the sherbet base: Pour the cooled dairy base into an ice cream maker and churn according to the manufacturer’s instructions until it reaches a soft serve consistency, which usually takes 20 to 25 minutes.
- Divide and flavor: Split the churned base into three parts. Mix one part with orange juice and a few drops of orange food coloring for color enhancement. Mix the second part with lime juice and green food coloring. Leave the third part as is and gently fold in the raspberry puree.
- Layer and freeze: In a freezer-safe container, layer the three flavored mixtures alternately — raspberry, lime, and orange — to create a colorful striped effect. Cover the container and freeze for 4 to 6 hours or until the sherbet is firm and scoopable.
Notes
- Use fresh, ripe raspberries for the best flavor and natural sweetness.
- If you don’t have food coloring, the natural colors of juices and raspberry puree will still give a lovely look.
- An ice cream maker is essential for proper texture, but if unavailable, place the mixture in a shallow container and stir every 30 minutes until firm.
- For a dairy-free version, substitute the cream and milk with coconut milk, but note the flavor and texture will differ.
- Store leftover sherbet covered in the freezer for up to one week for optimal freshness.
Nutrition
- Serving Size: 1/2 cup
- Calories: 180
- Sugar: 22g
- Sodium: 40mg
- Fat: 8g
- Saturated Fat: 5g
- Unsaturated Fat: 2.5g
- Trans Fat: 0g
- Carbohydrates: 26g
- Fiber: 1g
- Protein: 2g
- Cholesterol: 30mg
Keywords: rainbow sherbet, homemade sherbet, fruity sherbet, summer dessert, rainbow dessert, easy sherbet recipe